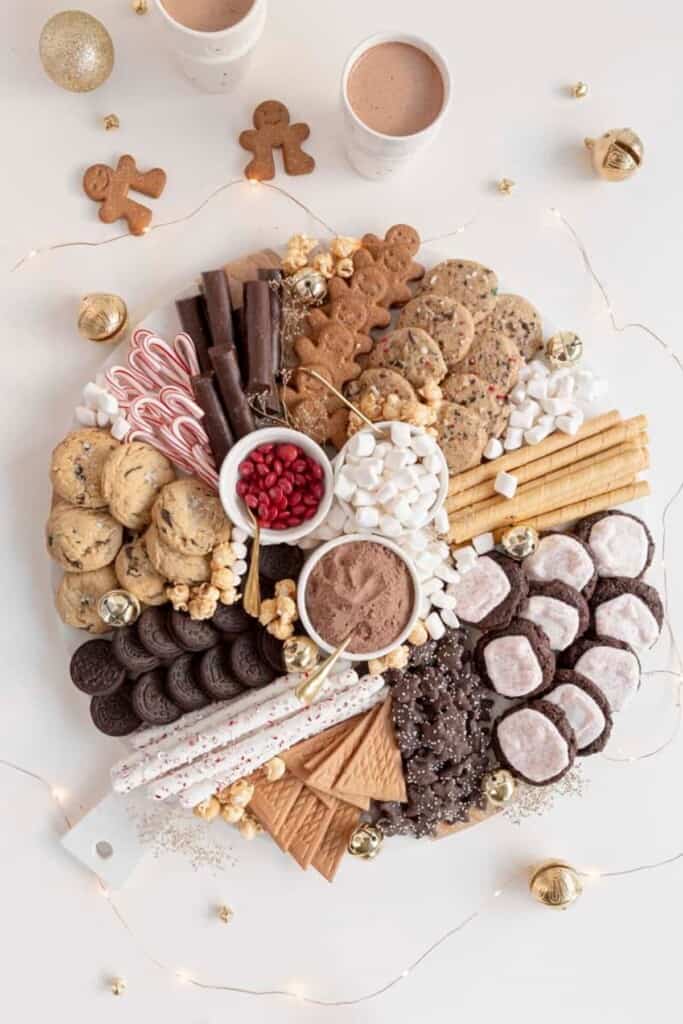
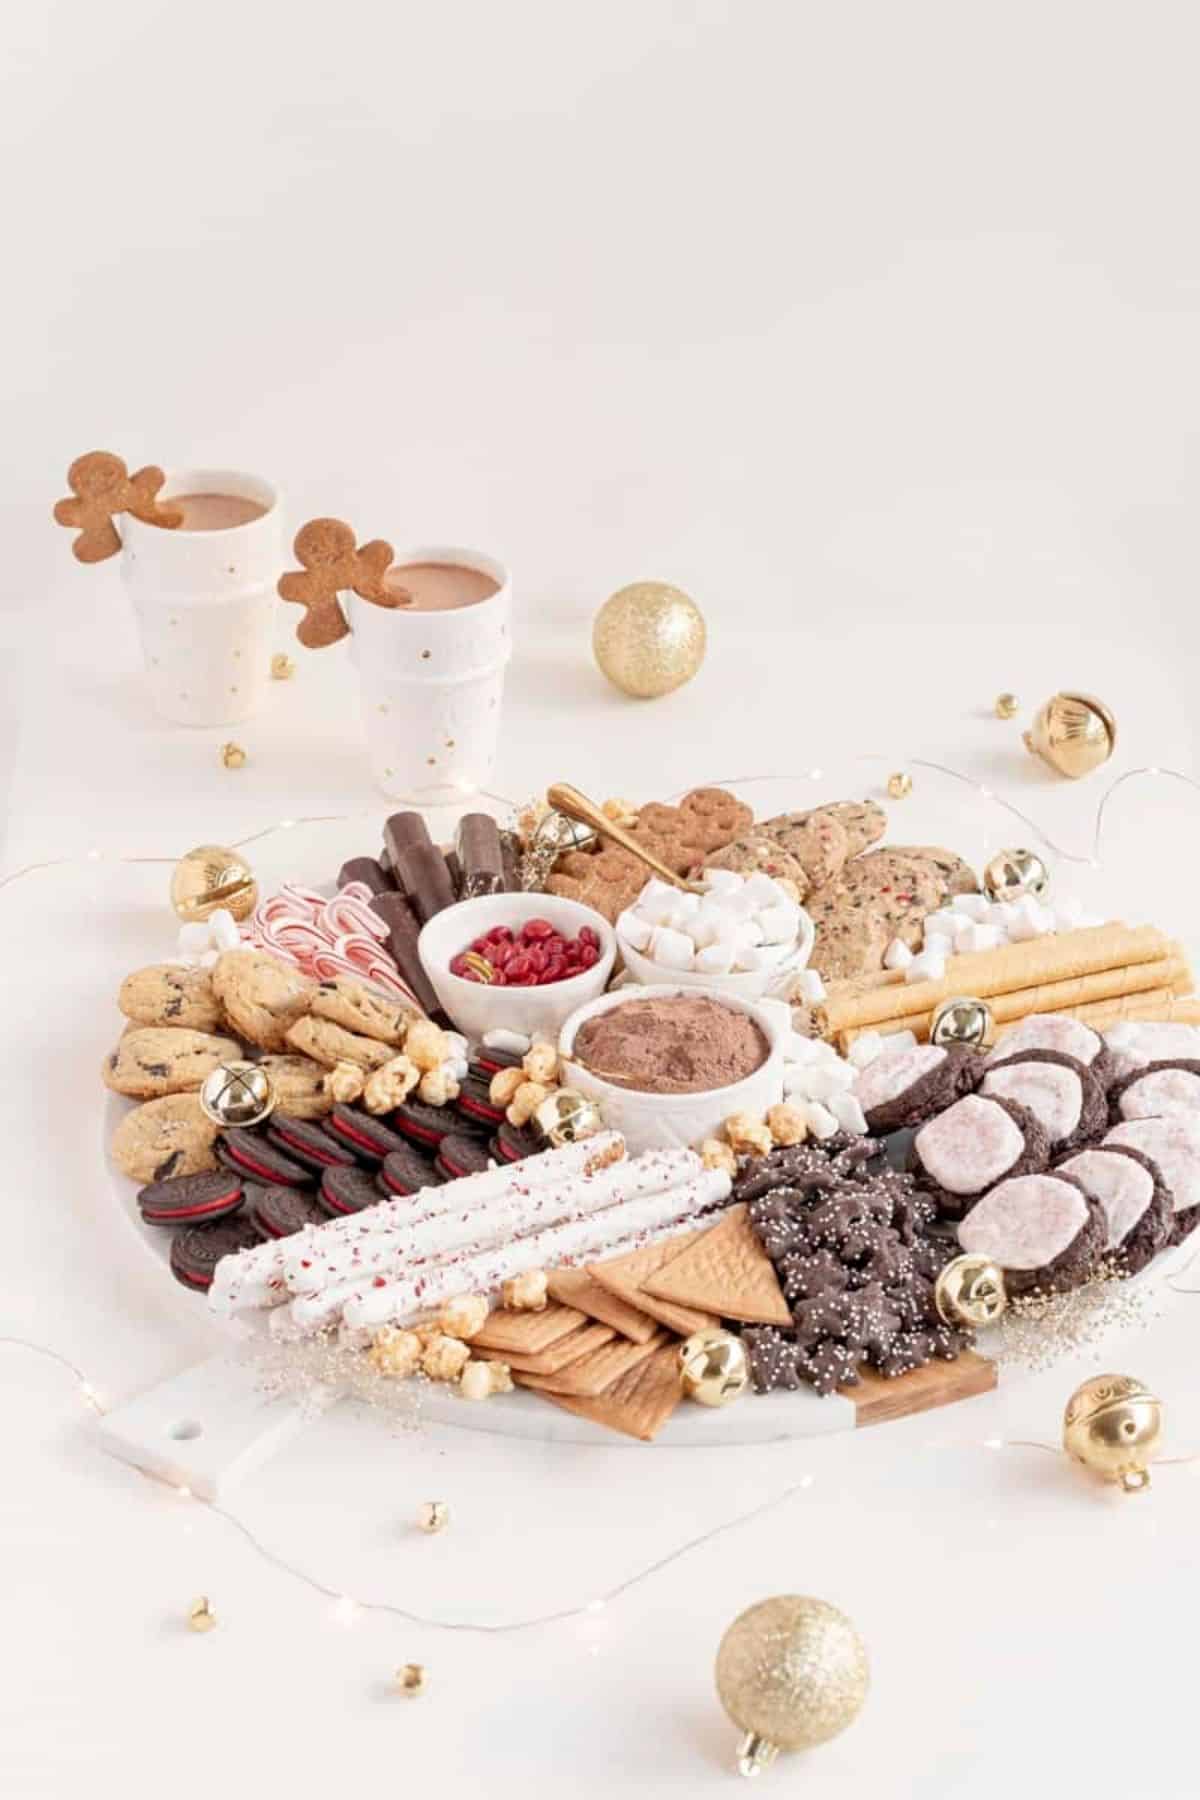
A super fun board that's filled with all your favorite holiday treats and hot cocoa staples. This is the perfect board for your next holiday or winter party!

Table of Contents
Why You Should Make this Board
I thought I would make another one of these fun boards like I’ve made in the past for something exciting to make and do before the holiday season gets here. Of course, this doesn’t need to be just for the holidays. You could 100% make this at any point of the winter or chillier seasons. You can customize it and make one for Valentine’s/Galentine’s or even for St. Patrick’s Day. Change up the physical board or the treats itself and you change it entirely. This board I used is from World Market.
For my basics around building the perfect boards, check out this post Simple Charcuterie Board.
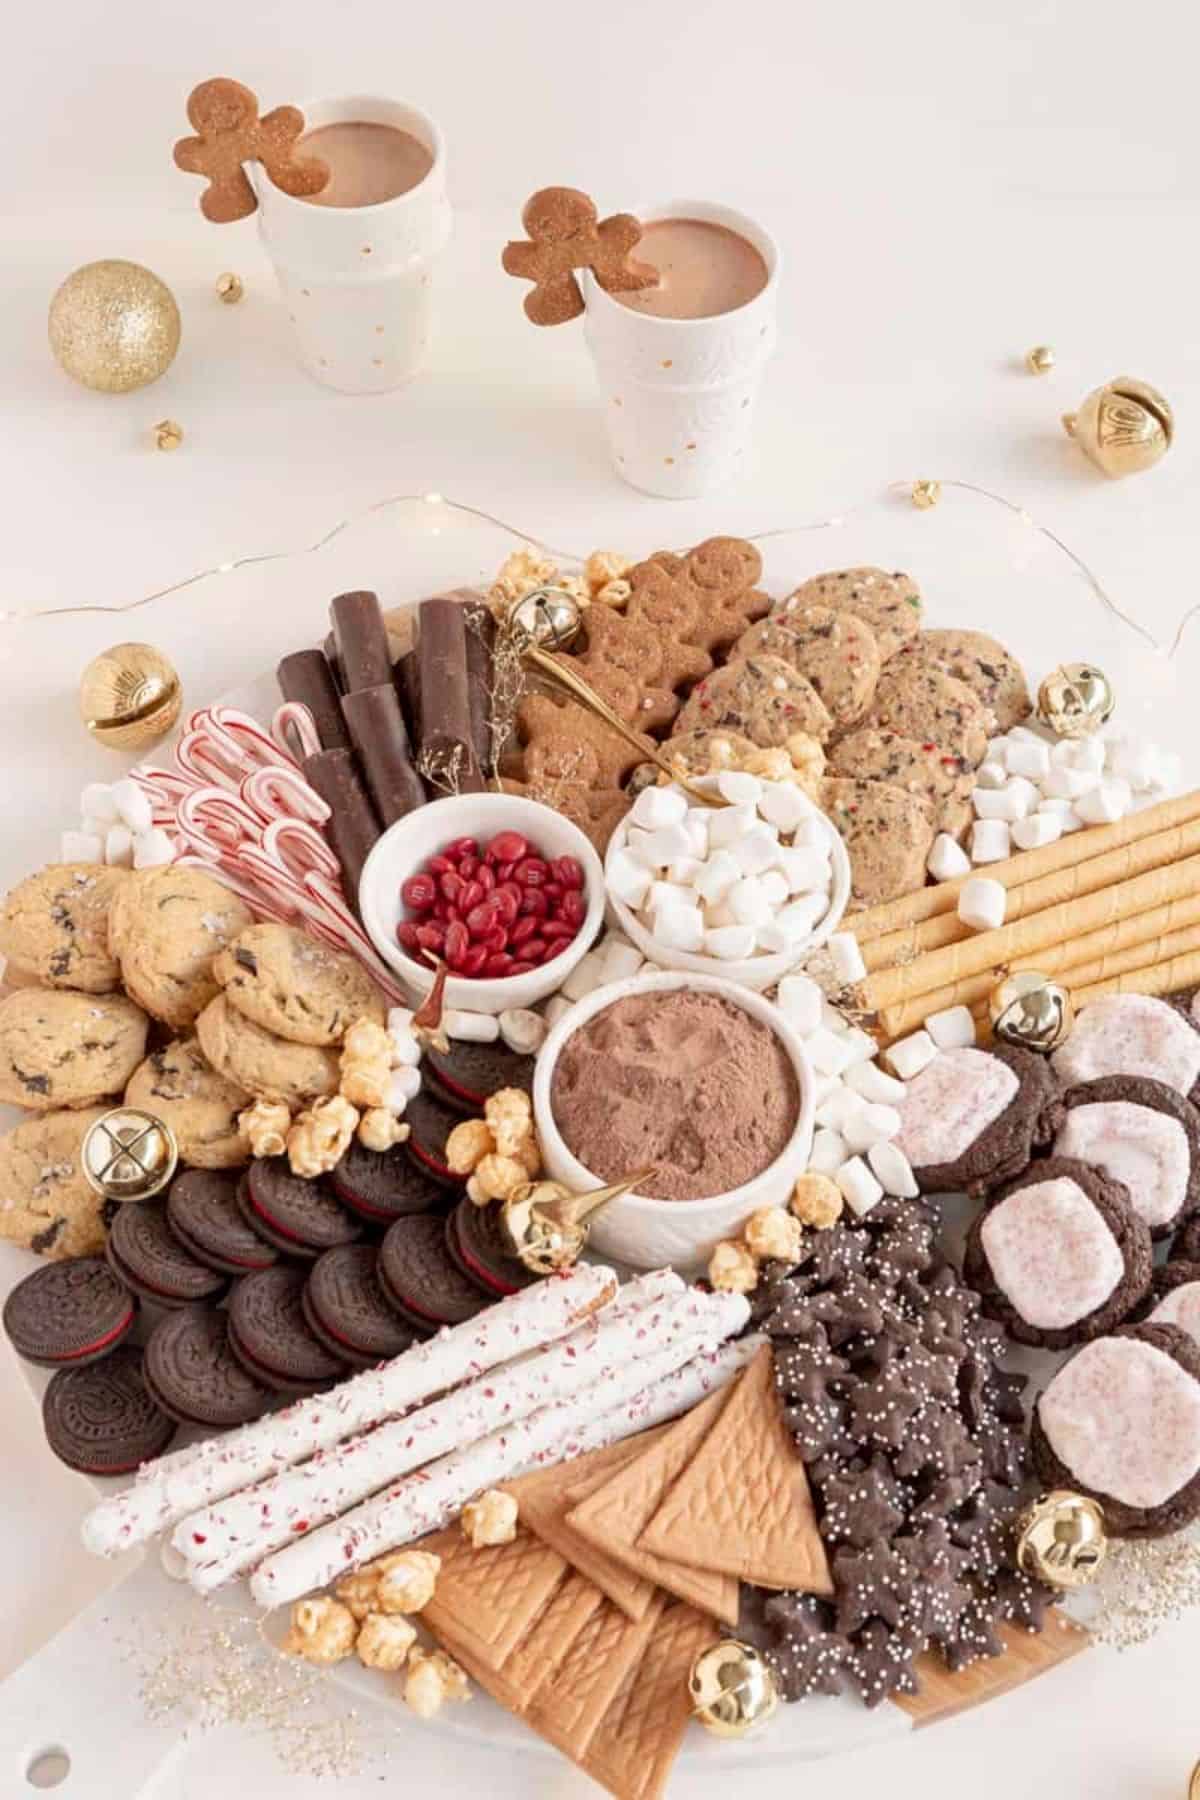
Hot Chocolate Grazing Board
There are a few key things to make these boards…
1) More is more…when you think you’ve done too much, keep going. Fill all the holes. 2) Stick to a theme or color palette. Makes it so much more visually appealing. 3) Have fun! I know it sounds silly. But honestly, this is a kitchen project that you don’t actually have to bake or cook for if you don’t want. So, have fun. Make things extra fancy, kitsch, whatever. Make it fun!
How to build a Graze Board
What to Put on a Hot Chocolate Bar
- Hot Chocolate: I used two types on this board. One was in a bowl and a powdered Peppermint Hot Chocolate. The second was in stick form and a Dark Hot Chocolate.
- Marshmallows: Every hot chocolate bar needs marshmallows. You can of course put out whipped cream too, but I would suggest keeping it separate from the board in in something that can be kept cool/cold.
- Mug buddies: These can be store-bought or homemade. I love these little gingerbread people ones from Trader Joe’s. They hang off the mug and are just so cute.
- Candy Canes: Whether mini or big, candy canes are a great treat for this board for being able to enjoy, but also for a stirring stick!
- Pirouette Cookies (rolled wafer cookies): These are also great to snack on, but also work great for stirring up your hot chocolate.
What to Put on a Dessert Platter
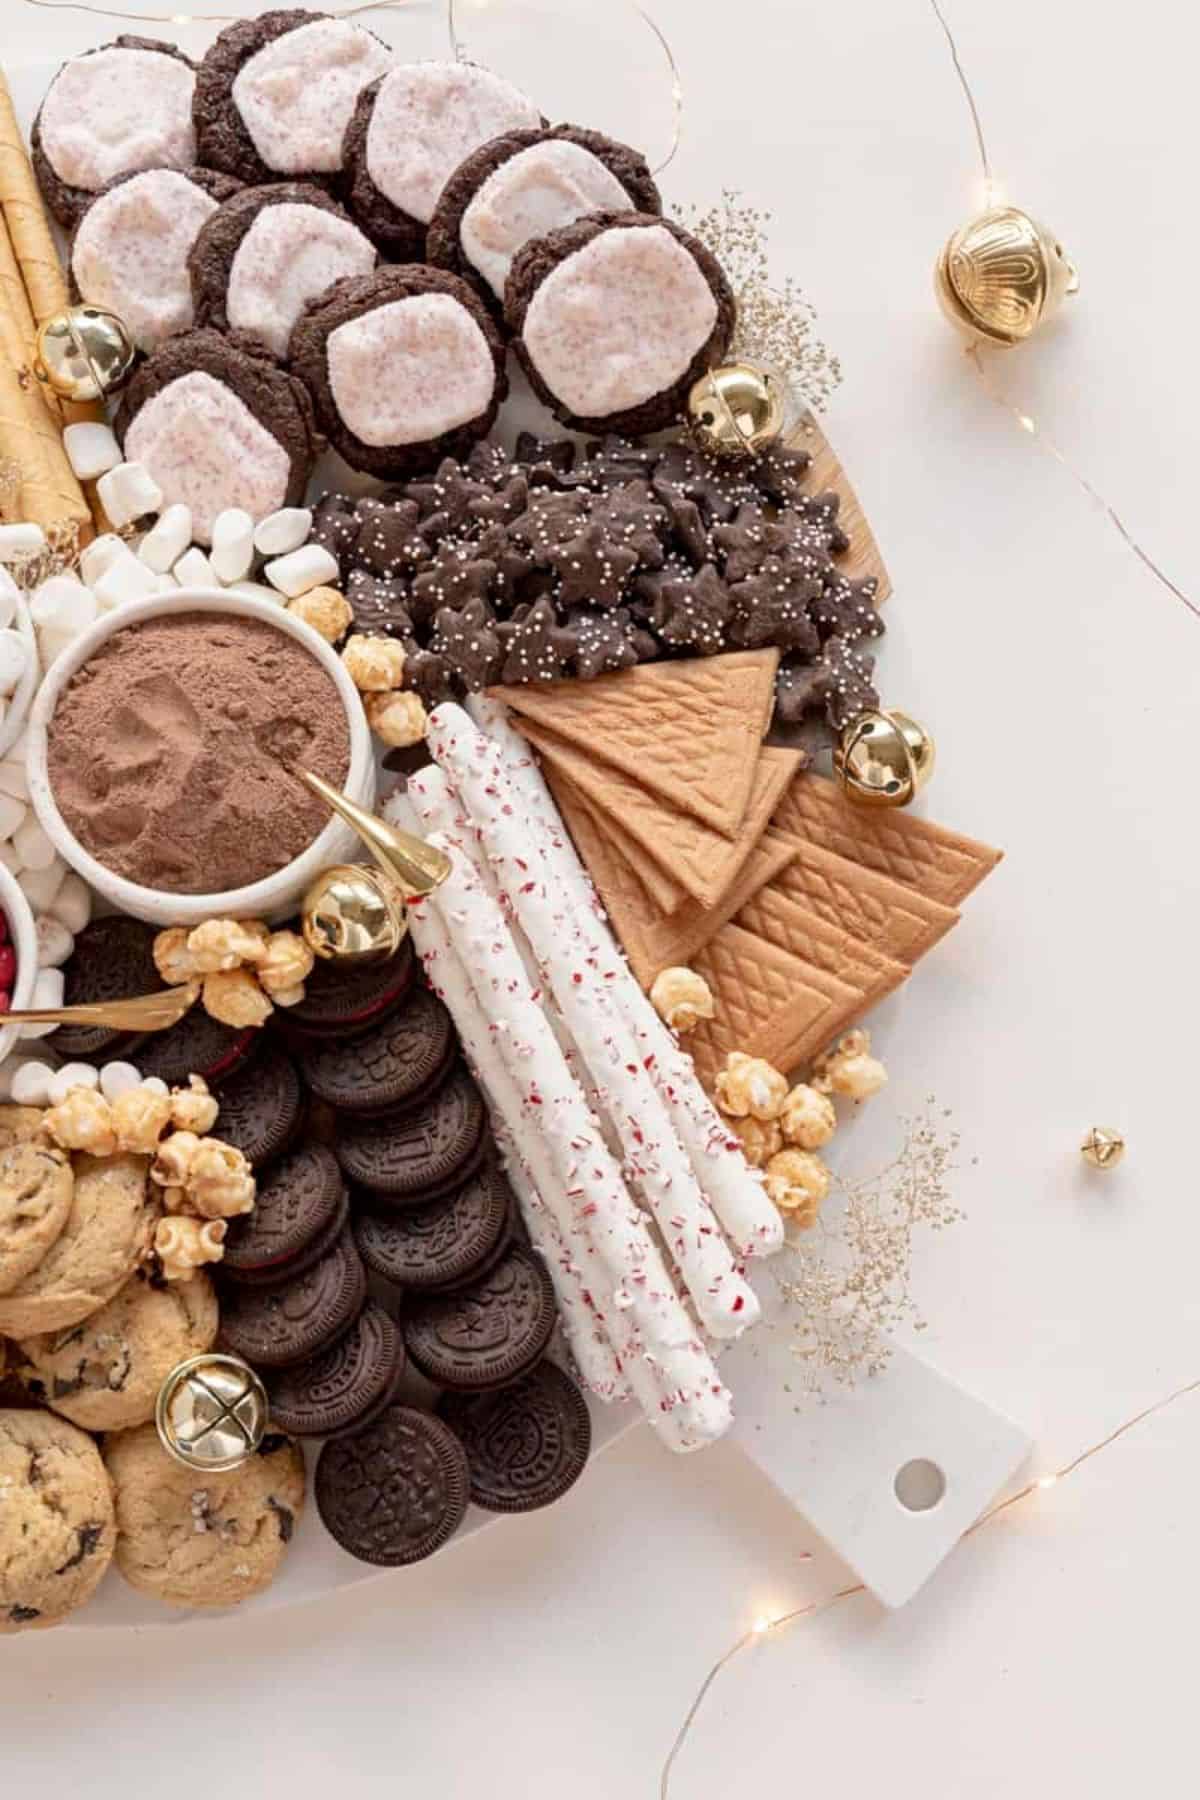
- Homemade Cookies: Again, could be store-bought or homemade. Here I have my Chocolate Chip Cookies, Hot Chocolate Cookies, and some slice and bake cookies.
- Chocolate Covered Pretzels: These are a holiday classic. You can make your own fairly easy. However, it’s not necessary and these are sold everywhere. And if you’re like me, you like to do a mix of store-bought and homemade. These I don’t mind buying.
- Holiday Oreos: Oreos are already a favorite in my house. But holiday Oreos are better…right? Like nothing beats a Halloween Oreo. They are just more special. And I do love that Christmas Oreos have that red filling that matches this festive board.
- Caramel Popcorn: You always need something little that’s a good filler. I love using regular or caramel popcorn for this.
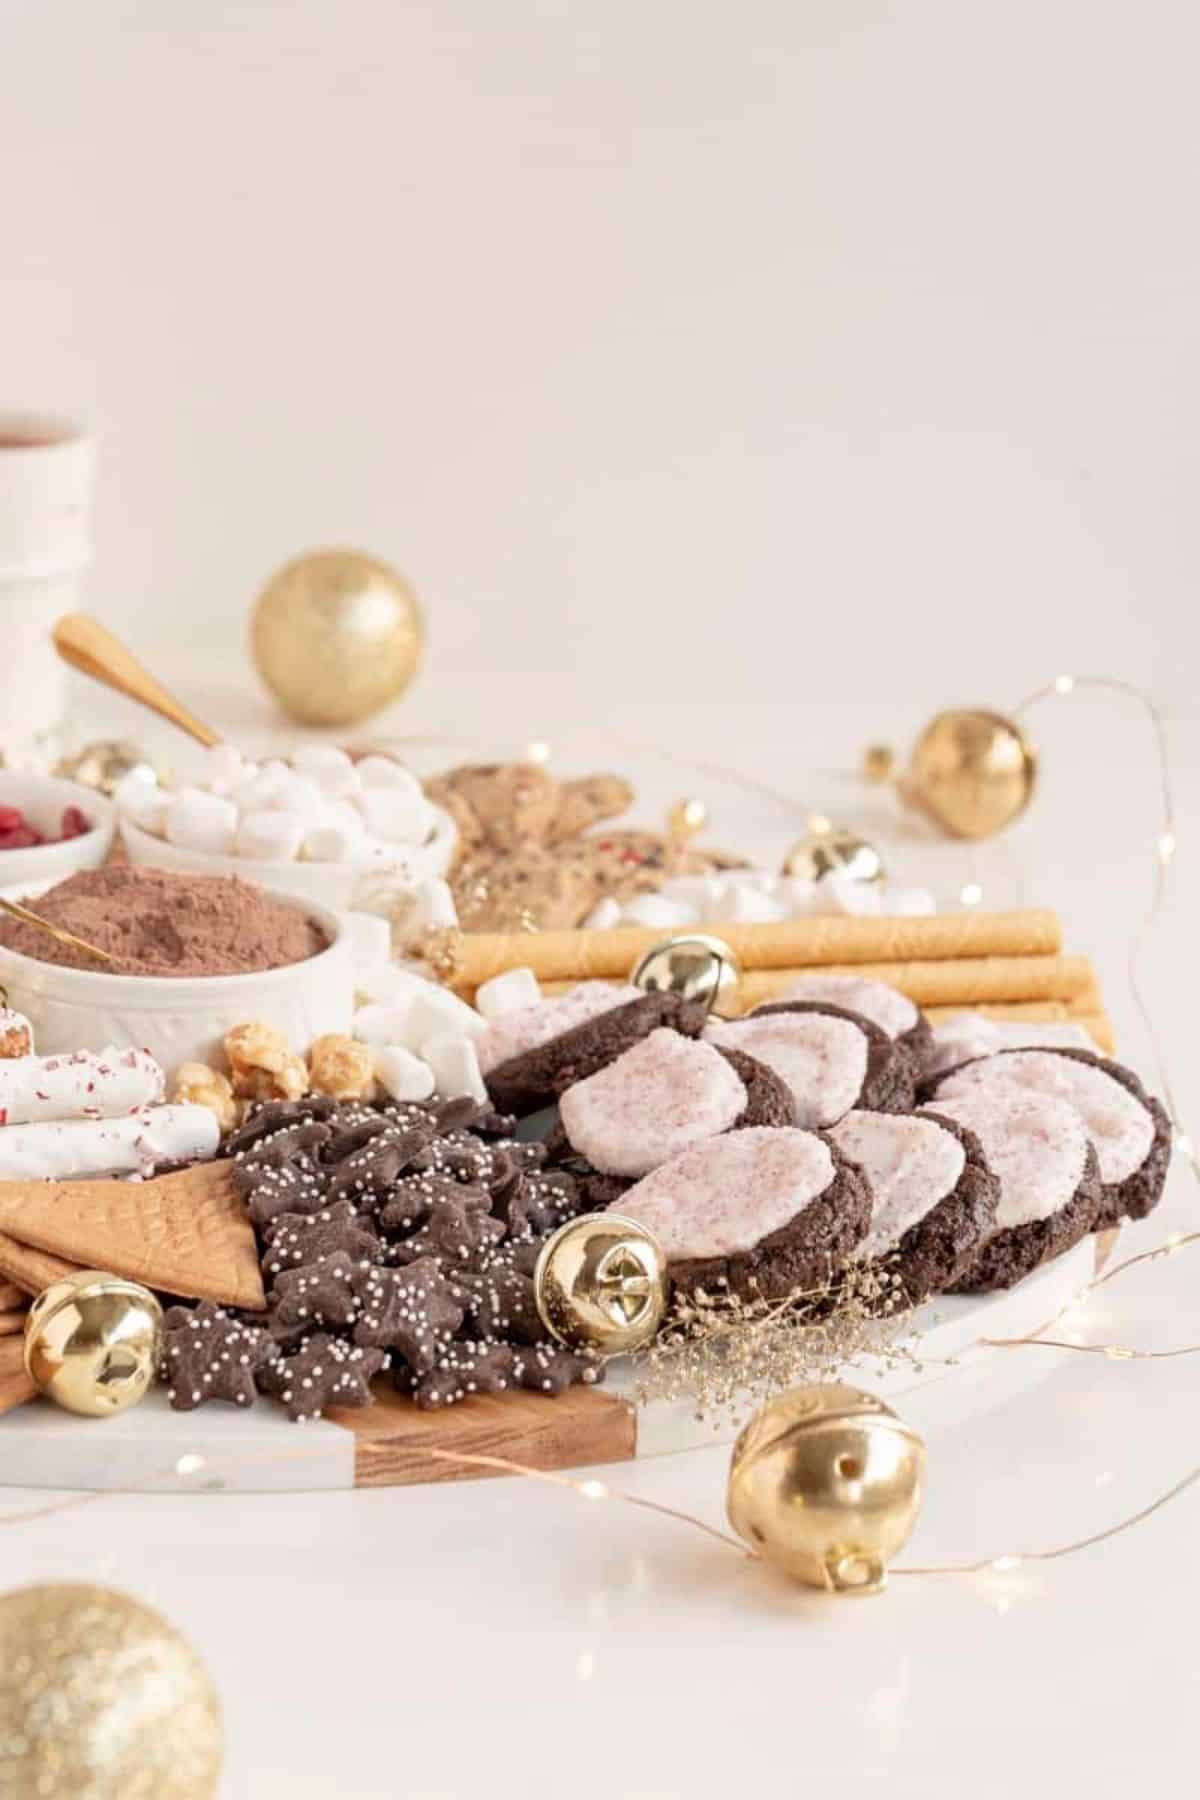
- Mini Star Cookies: These are another favorite from TJs. We love these little Mint Mini Chocolate Star Cookies. They are so festive looking, but also taste delicious and fill up space nicely.
- Wafer Cookies: I personally like to add something a little simpler/plain on a board. This is great for the person who maybe doesn’t like big flavor. Or just wants one thing a bit simpler.
- Holiday M&Ms: It doesn’t have to be these specifically, but could be any other holiday candy. I just personally love M&Ms and all the fun colors they come in.
How to Assemble a Dessert Charcuterie Board
- Bake – This means baking your items cookies, brownies, etc. You can definitely make these a few days in advance. Or even make the dough a few days in advance and bake the day of.
- Prep your ingredients – Anything that needs to be unpackaged, cut up, etc.
- Place board – Place board wherever it is you’ll be serving it. It’s much easier this way! Carrying around a big and heavy board isn’t great for your back, but also it can cause pieces to roll off the board and then you have sprinkles and food everywhere…trust me, been there.
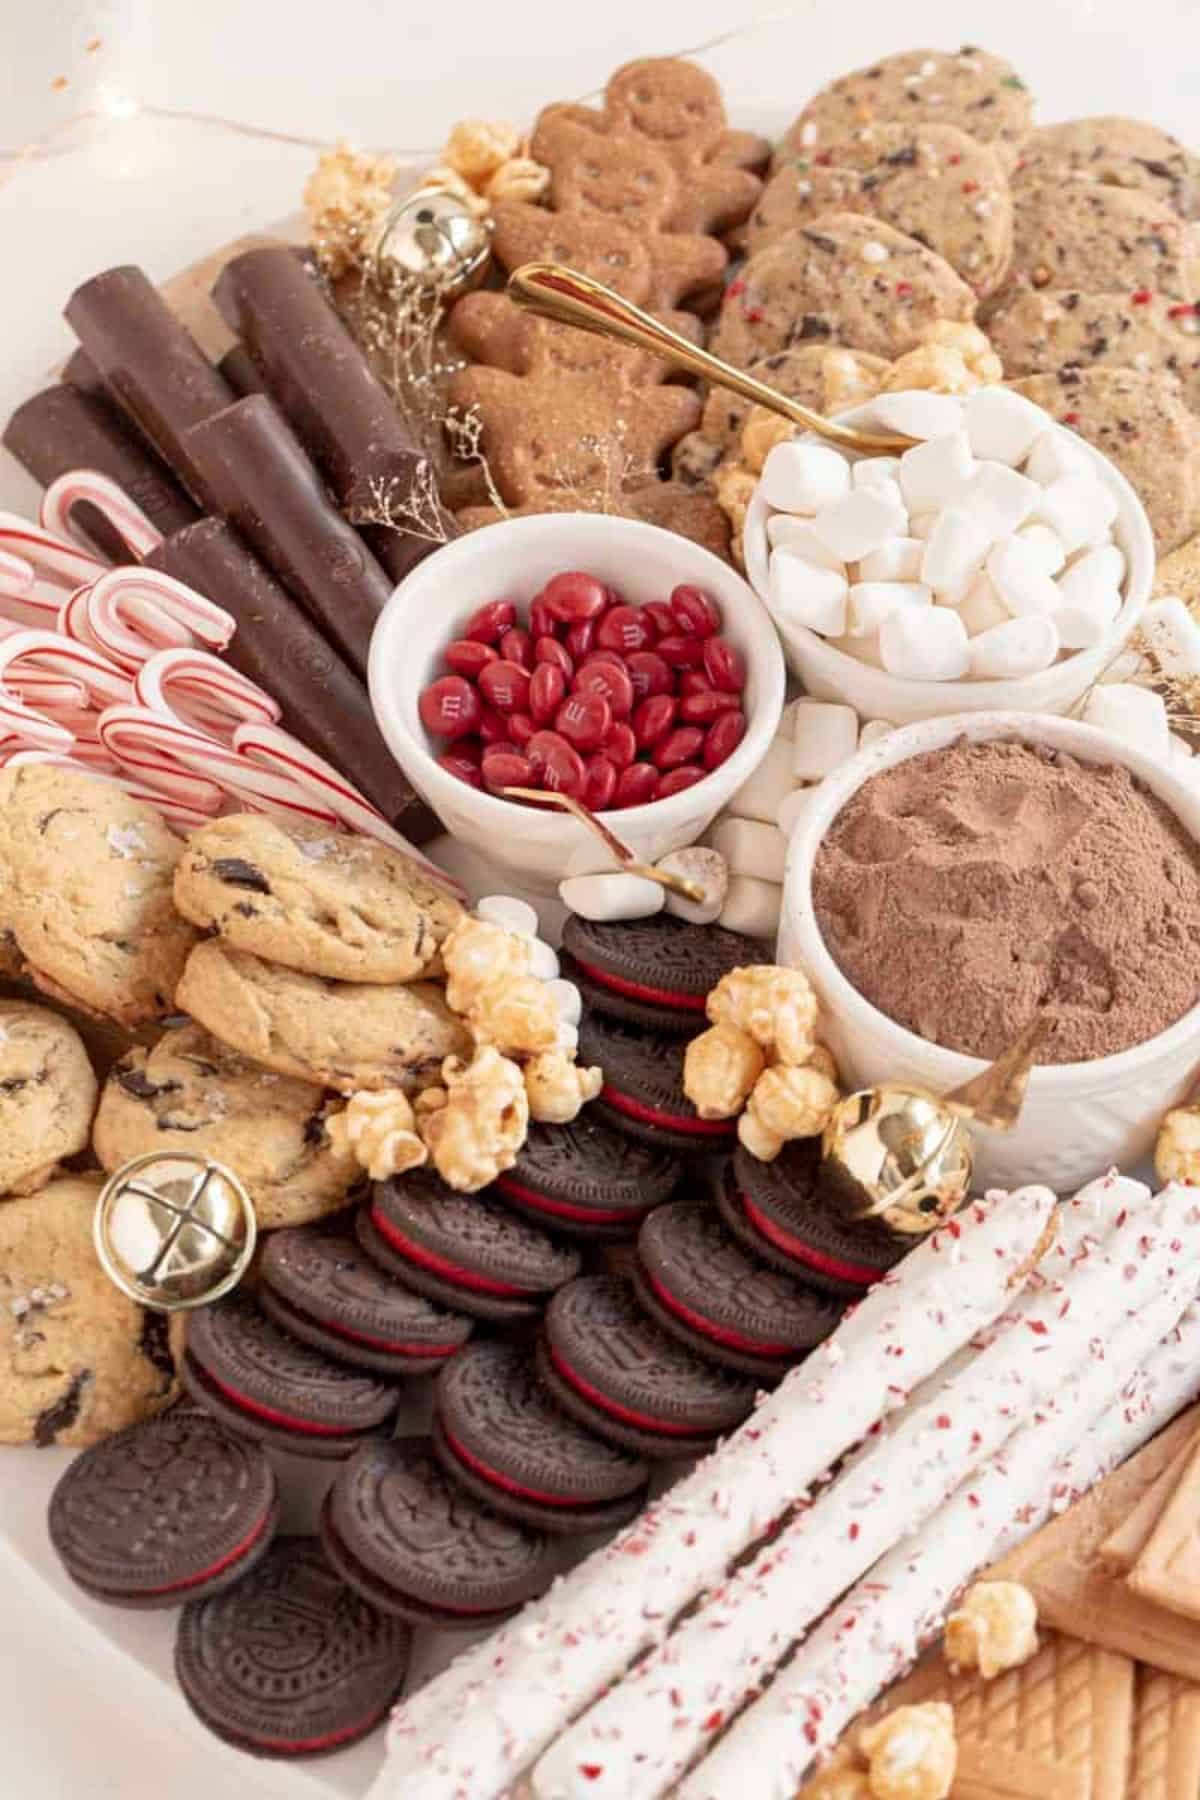
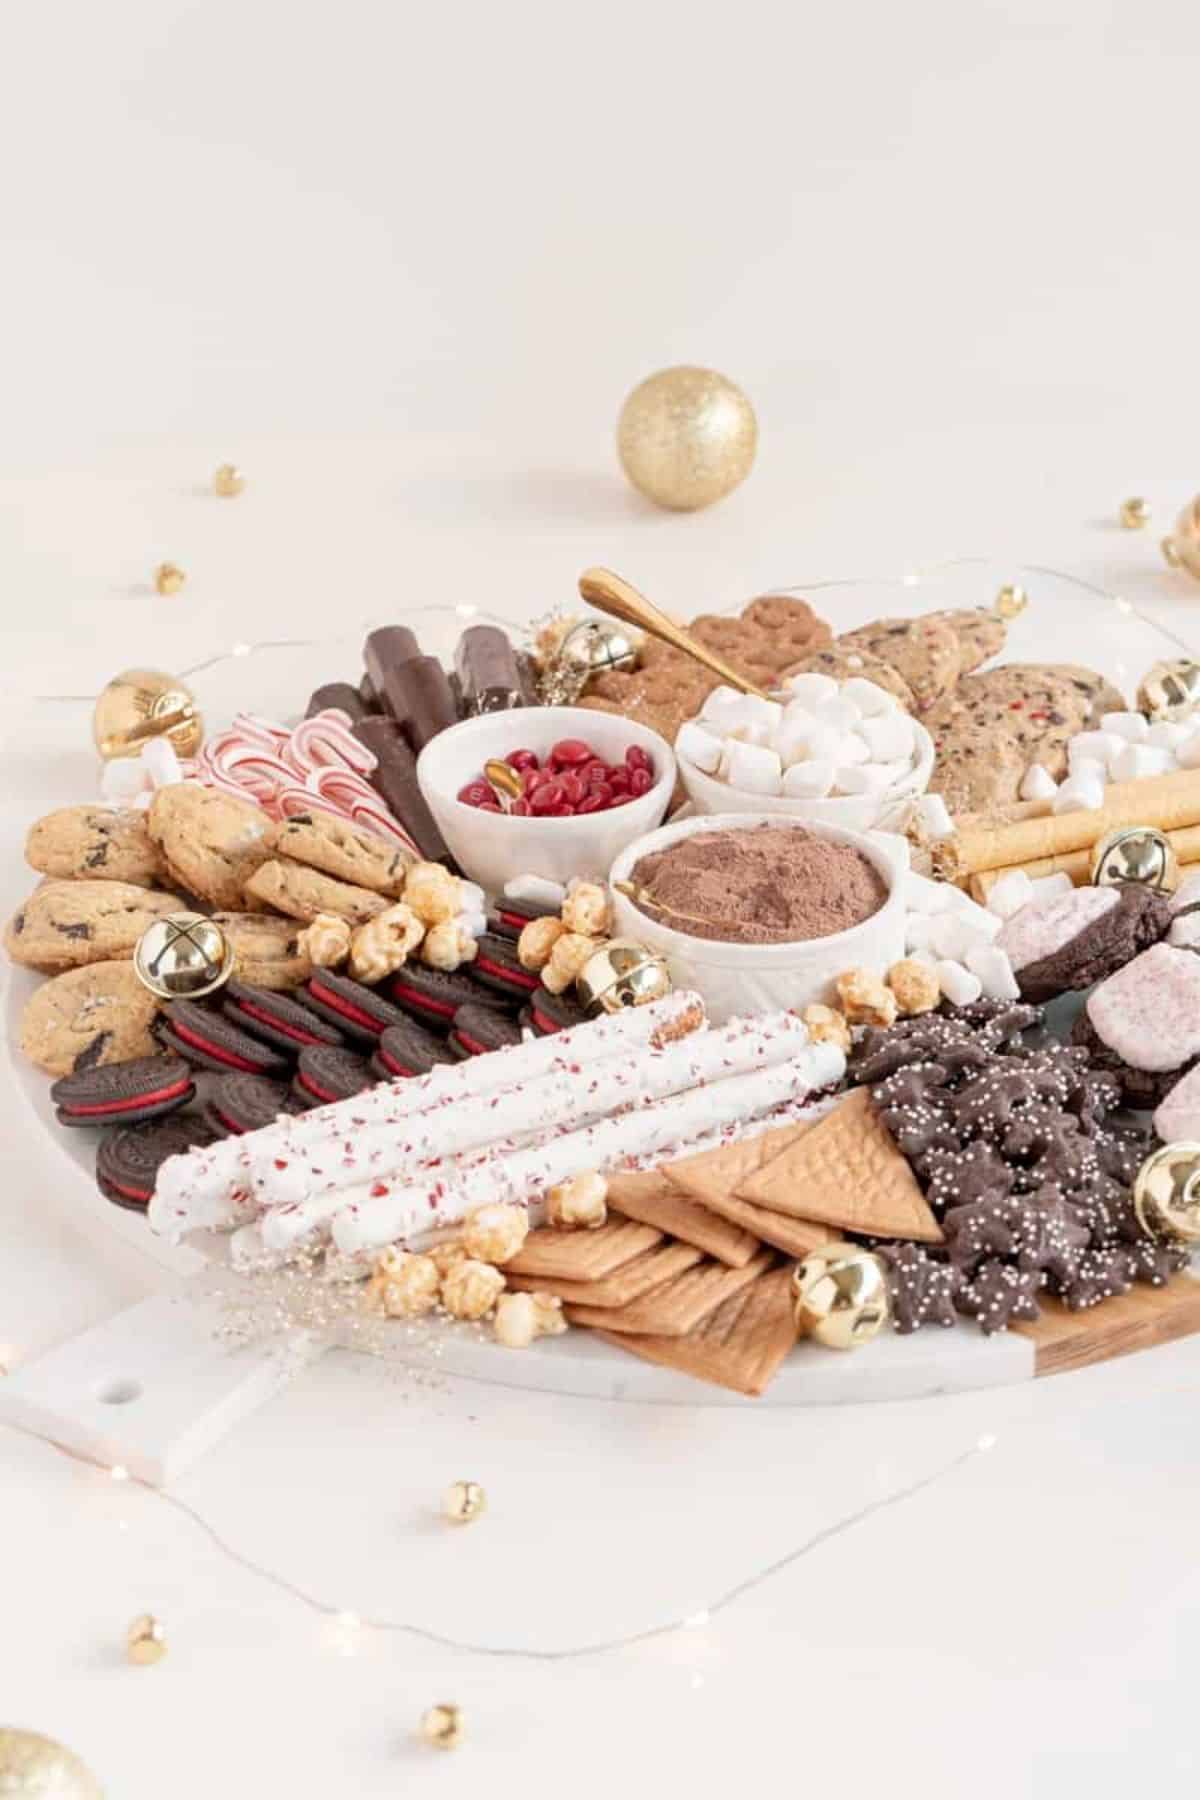
- Create the layout – You’ll want to layout your bowls first as they can take up the most room and create a good focal point. So for this, I did my three bowls first and decided what should go in them…honestly, what would need a spoon! Fill those you have prepped and ready. Here that was M&Ms, hot cocoa, and marshmallows.
- Place the hero pieces – I like to place things that are the most important first. For this I thought of the home baked cookies as the heroes. They are different colors and would look nice on separate sides of the board. I split them up in three areas and tried to layer and fan as I could. Try to lay those around placed items if possible.
- Place larger items/supporting ingredients – In this case, it’s the longest items, the chocolate covered pretzel rods and the pirouette cookies. I wanted them on opposite sides of the board for balance. Again, build around the pieces already on the board. Then items like Oreos, wafer cookies, mug buddies, hot chocolate sticks, etc.
- Fillers – I always use a few things as fillers. For this board our fillers are marshmallows, popcorn, and candy canes. Stick this in the empty spots. For a board like this…more is always more. Just keep going!
- Utensils – Stick in small spoons, forks, etc. where needed. I only used them with the bowls for this one. But you could place them out for each items or a few tongs for the whole thing.
- Decorate – If you like a bit of extra flair, like I do, you can always add edible flowers, décor, etc. to fill in any last holes. Or you can add things like luster dust or prism powder for more glitz. I used little jingle bells and glittery florals. Make sure everything that touches the food is food safe.
- Assemble the off the Board Necessities – mugs, hot water and/or milk, whipped cream, plates, etc. whatever can’t go on the board. You could use the area next to this to just place them or set something up on tiered platters, etc.
FAQs for Hot Cocoa and Treat Board
Anything food safe. I tent to use wooden, marble, or stone boards. I have a variety and choose the one that will work best size-wise, but also if there is anything that could stain.
More. The answer is to keep adding more. Yes, patterns of shapes/sizes, adding in bowls for height, keeping to a color scheme can always help. But the biggest issue I see are sparse boards. More is more in this case. Keep adding.
Other Boards to Try
- Hot Cocoa and Mexican Hot Chocolate
- Charcuterie Wreath
- Halloween Candy Board
- Galentine’s Day Sweet Treat Board
- S’Mores Board
- Salty and Sweet Board
- Simple Charcuterie Board
Love this Post?
Did you use this article and did it help you? Awesome! If you have a quick minute and could leave a comment below, I would appreciate the support and knowing your feedback! And if you’re over on Instagram, be sure to tag me in your photos.
Equipment
- Wooden or Marble/Stone Board
Ingredients
What to Put on a Hot Chocolate Bar:
- Hot Chocolate: I used two types on this board. One was in a bowl and a powdered Peppermint Hot Chocolate. The second was in stick form and a Dark Hot Chocolate.
- Marshmallows: Every hot chocolate bar needs marshmallows. You can of course put out whipped cream too, but I would suggest keeping it separate from the board in in something that can be kept cool/cold.
- Mug buddies: These can be store-bought or homemade. I love these little gingerbread people ones from Trader Joe’s. They hang off the mug and are just so cute.
- Candy Canes: Whether mini or big candy canes are a great treat for this board for being able to enjoy, but also for a stirring stick!
- Pirouette Cookies (rolled wafer cookies): These are also great to snack on, but also work great for stirring up your hot chocolate.
What to Put on a Dessert Platter:
- Homemade Cookies: Again, could be store-bought or homemade. Here I have my Chocolate Chip Cookies, Hot Chocolate Cookies, and some slice and bake cookies.
- Chocolate Covered Pretzels: These are a holiday classic. You can make your own fairly easy. However, it’s not necessary and these are sold everywhere. And if you’re like me, you like to do a mix of store-bought and homemade. These I don’t mind buying.
- Holiday Oreos: Oreos are already a favorite in my house. But holiday Oreos are better…right? Like nothing beats a Halloween Oreo. They are just more special. And I do love that Christmas Oreos have that red filling that matches this festive board.
- Caramel Popcorn: You always need something little that’s a good filler. I love using regular or caramel popcorn for this.
- Mini Star Cookies: These are another favorite from TJs. We love these little Mint Mini Chocolate Star Cookies. They are so festive looking, but also taste delicious and fill up space nicely.
- Wafer Cookies: I personally like to add something a little simpler/plain on a board. This is great for the person who maybe doesn’t like big flavor. Or just wants one thing a bit simpler.
- Holiday M&Ms: It doesn’t have to be these specifically, but could be any other holiday candy. I just personally love M&Ms and all the fun colors they come in.
Instructions
How to Assemble a Dessert Charcuterie Board:
- Bake – This means baking your items cookies, brownies, etc. You can definitely make these a few days in advance. Or even make the dough a few days in advance and bake the day of.
- Prep your ingredients – Anything that needs to be unpackaged, cut up, etc.
- Place board – Place board wherever it is you’ll be serving it. It’s much easier this way! Carrying around a big and heavy board isn’t great for your back, but also it can cause pieces to roll off the board and then you have sprinkles and food everywhere…trust me, been there.
- Create the layout – You’ll want to layout your bowls first as they can take up the most room and create a good focal point. So for this, I did my three bowls first and decided what should go in them…honestly, what would need a spoon! Fill those you have prepped and ready. Here that was M&Ms, hot cocoa, and marshmallows.
- Place the hero pieces – I like to place things that are the most important first. For this I thought of the home baked cookies as the heroes. They are different colors and would look nice on separate sides of the board. I split them up in three areas and tried to layer and fan as I could. Try to lay those around placed items if possible.
- Place larger items/supporting ingredients – In this case, it’s the longest items, the chocolate covered pretzel rods and the pirouette cookies. I wanted them on opposite sides of the board for balance. Again, build around the pieces already on the board. Then items like Oreos, wafer cookies, mug buddies, hot chocolate sticks, etc.
- Fillers – I always use a few things as fillers. For this board our fillers are marshmallows, popcorn, and candy canes. Stick this in the empty spots. For a board like this…more is always more. Just keep going!
- Utensils – Stick in small spoons, forks, etc. where needed. I only used them with the bowls for this one. But you could place them out for each items or a few tongs for the whole thing.
- Decorate – If you like a bit of extra flair, like I do, you can always add edible flowers, décor, etc. to fill in any last holes. Or you can add things like luster dust or prism powder for more glitz. I used little jingle bells and glittery florals. Make sure everything that touches the food is food safe.
- Assemble the off the Board Necessities – mugs, hot water and/or milk, whipped cream, plates, etc. whatever can’t go on the board. You could use the area next to this to just place them or set something up on tiered platters, etc.
Monica says
This was so fun and my kids loved it. Made it for a treat after going to look at holiday lights. Thank you!
wilensamanda says
Aw! Yay! I think that's such a fun tradition.