This post has been sponsored by Local Hive™. All thoughts and opinions are my own.
Below you'll find the how-to for this board, as well as links for the recipes you'll find on the board:
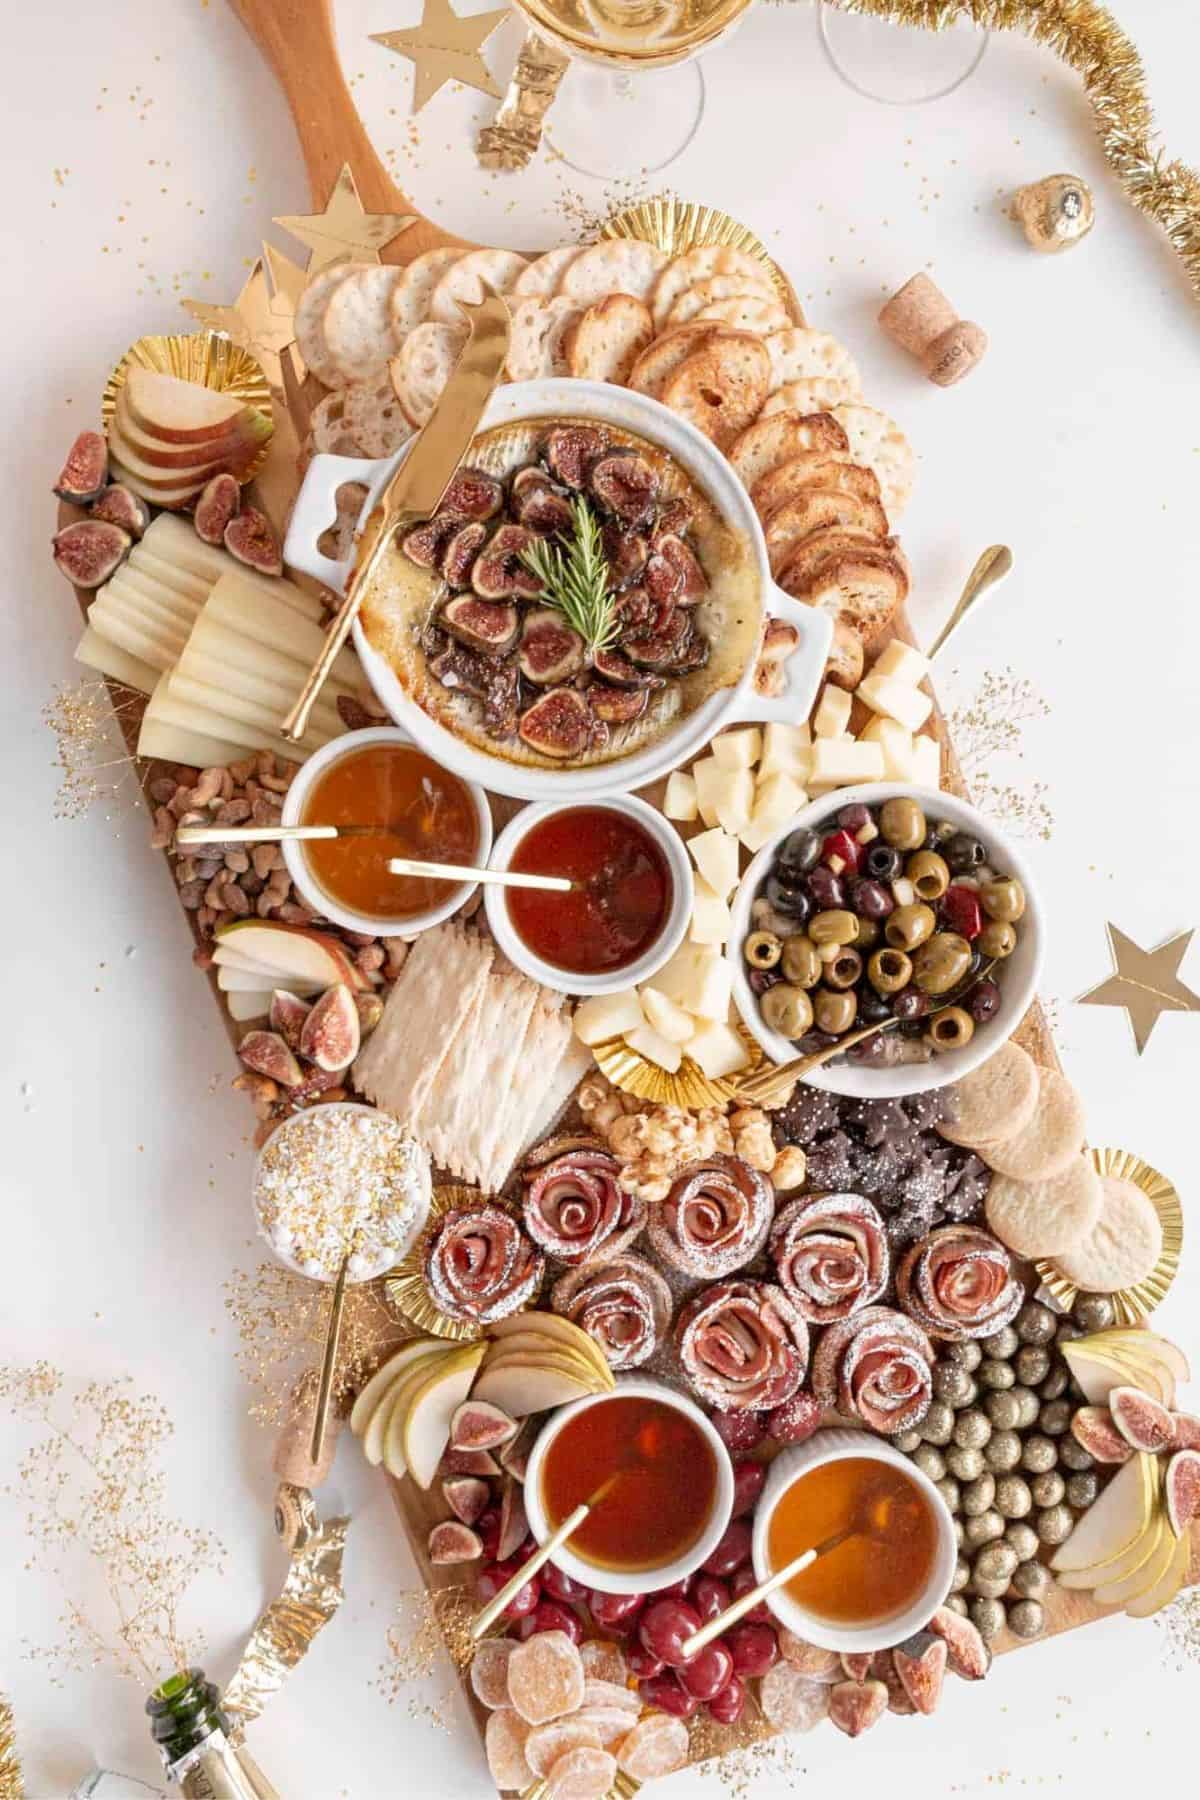
Table of Contents
Why You Should Make this Board
New Year’s Eve is just around the corner and I love celebrating with good food, those I love, and lots of sparkle. To ring in 2021, I’m partnering with my favorite honey company, Local Hive™. Honey has been said to represent prosperity, so I felt like this was a great food to incorporate into New Year’s Eve plans.
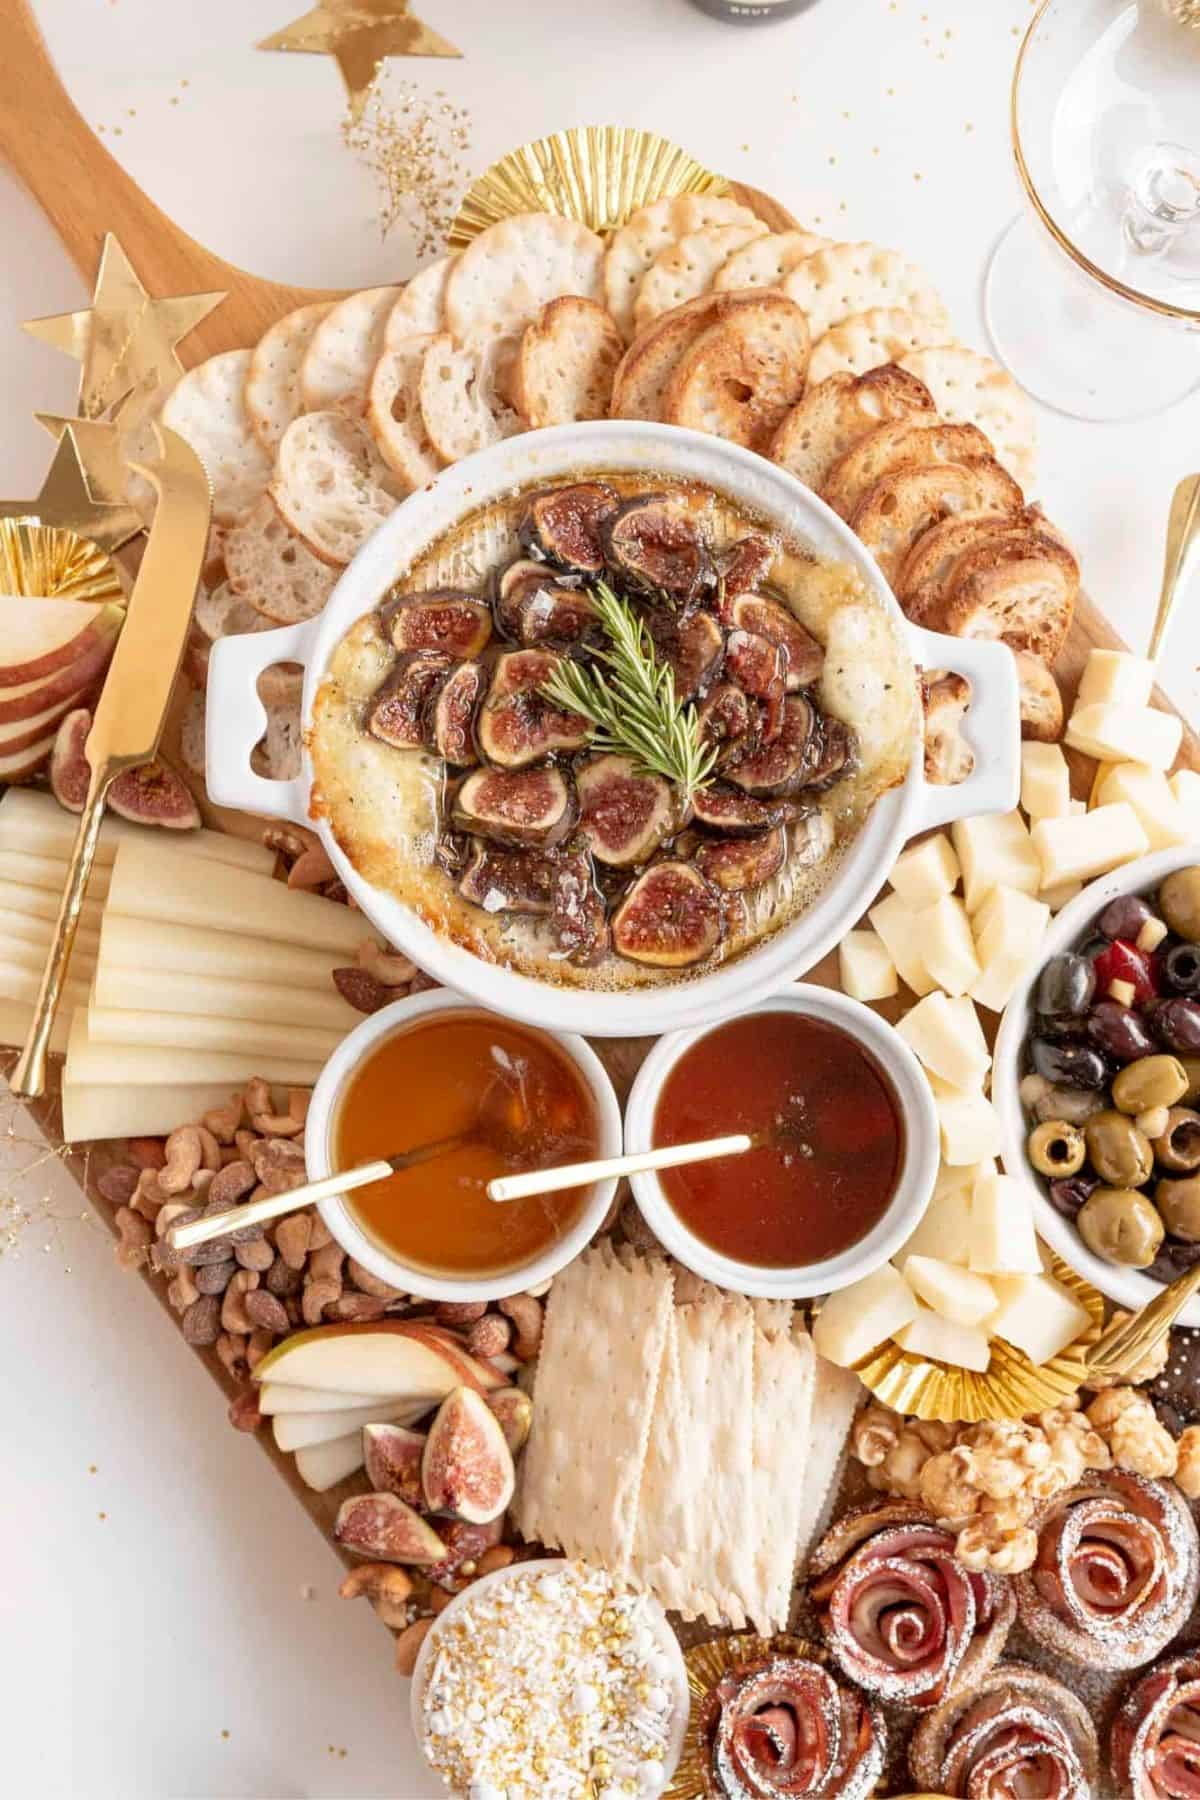
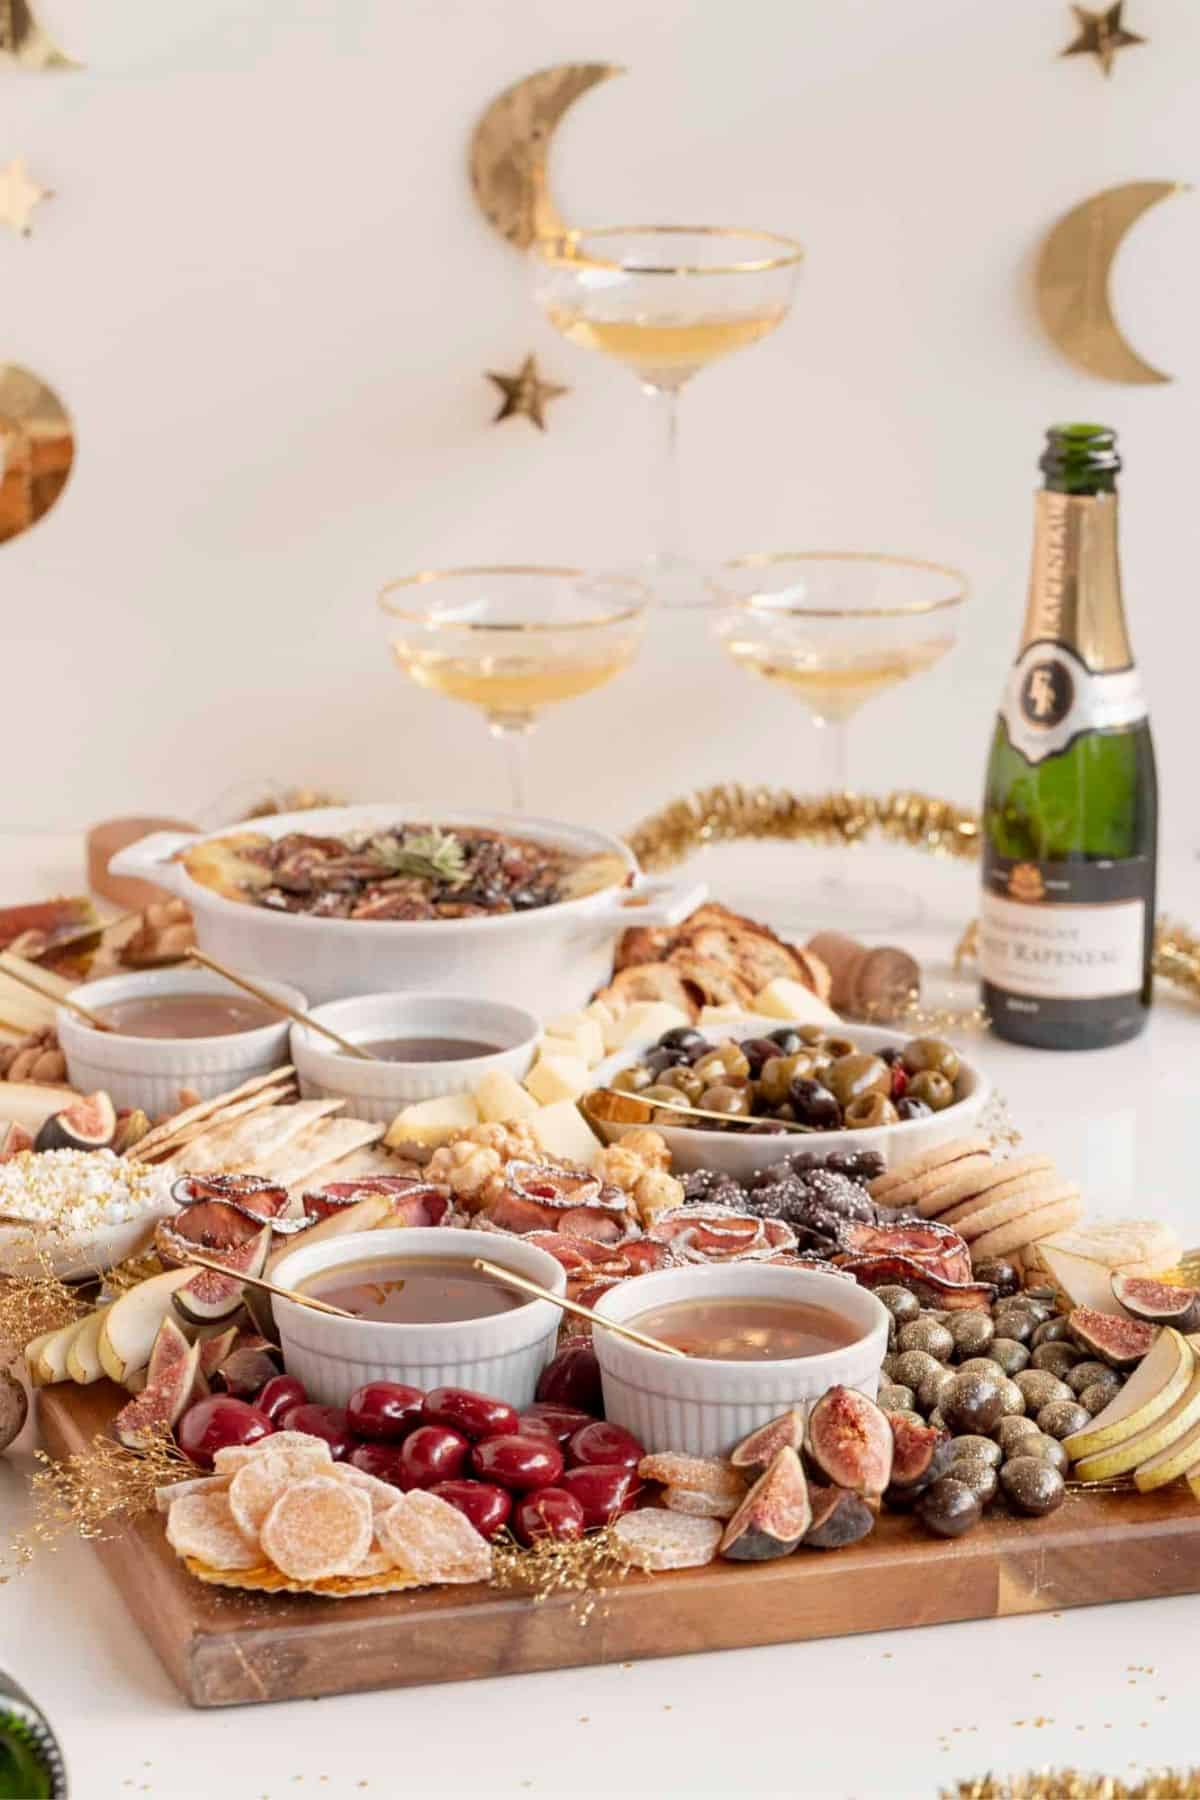
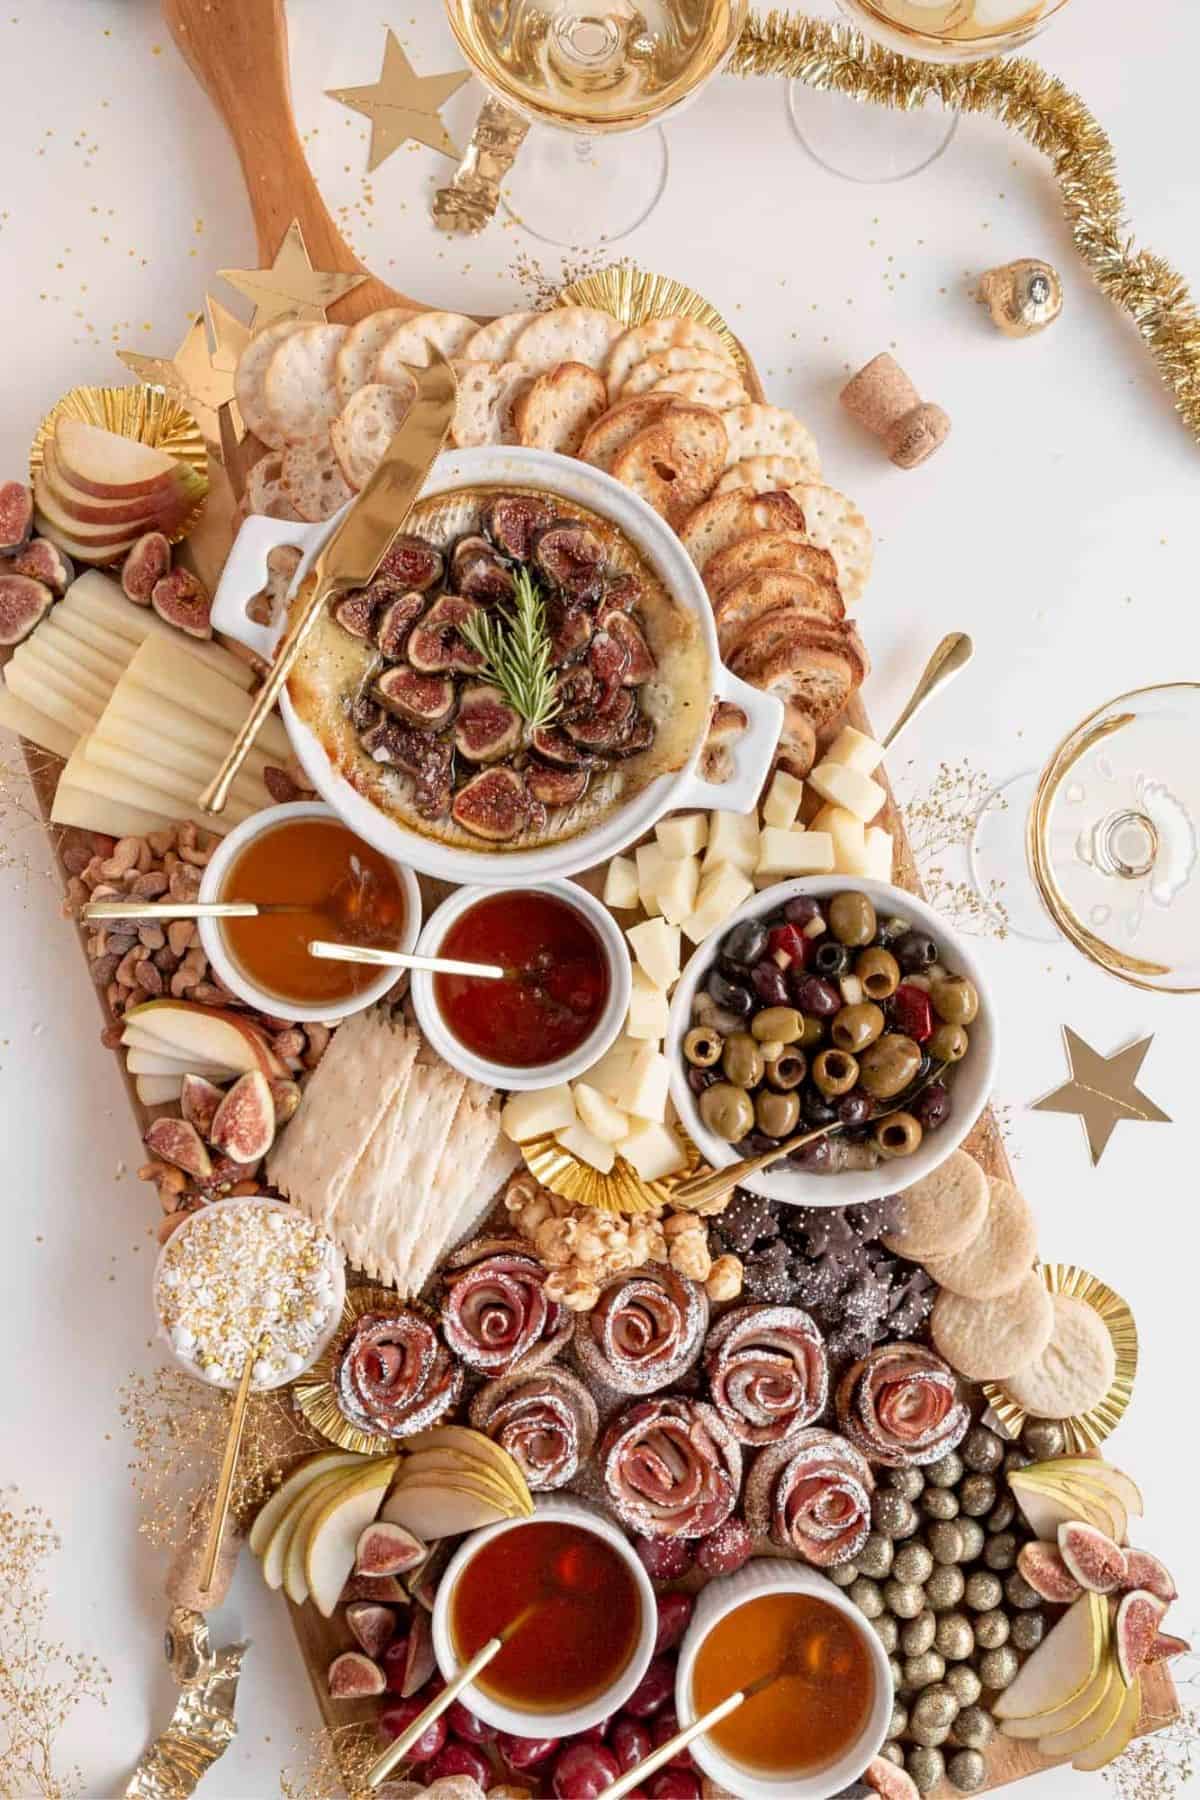
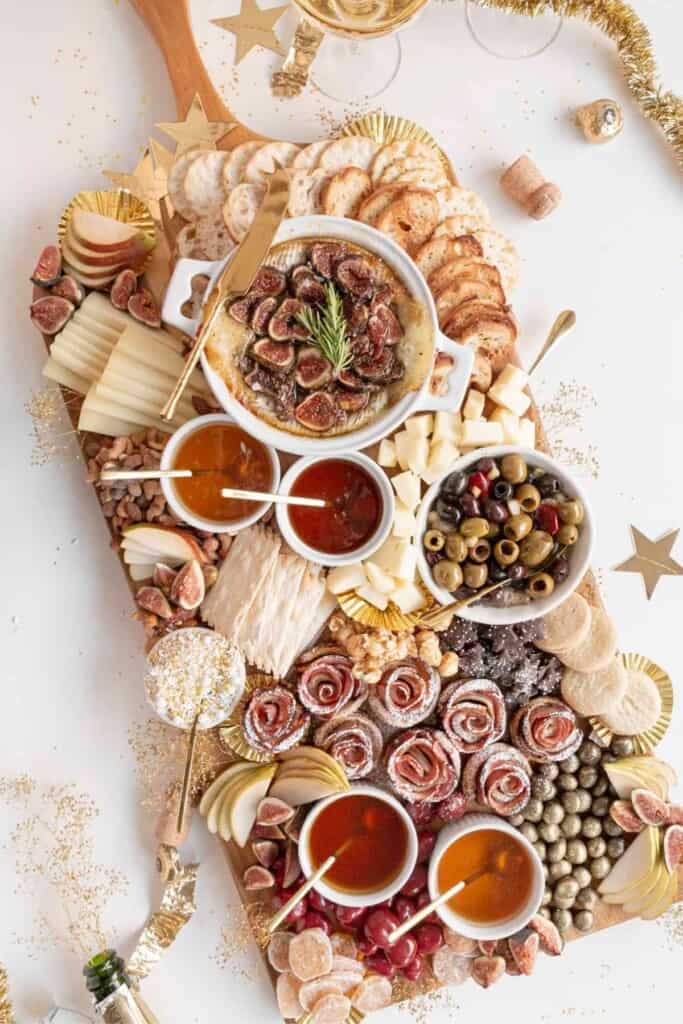
This Salty and Sweet Grazing Board is a great board to cover your bases of both appetizer and desserts. This is the perfect party board, even if it’s just one or two of you partying! You’ll want to find a board size that matches your party size. This board would happily feed 6-8 guests. Below you’ll find details about all the different foods found on this board. You can always swap out items you don’t like for something you love. Feel free to customize as wanted. The most important pieces on this board are the Baked Brie with Figs and Honey and the Rose Apple Tarts. Both are made with Local Hive™ Honey.
For my basics around building the perfect boards, check out this post Simple Charcuterie Board.
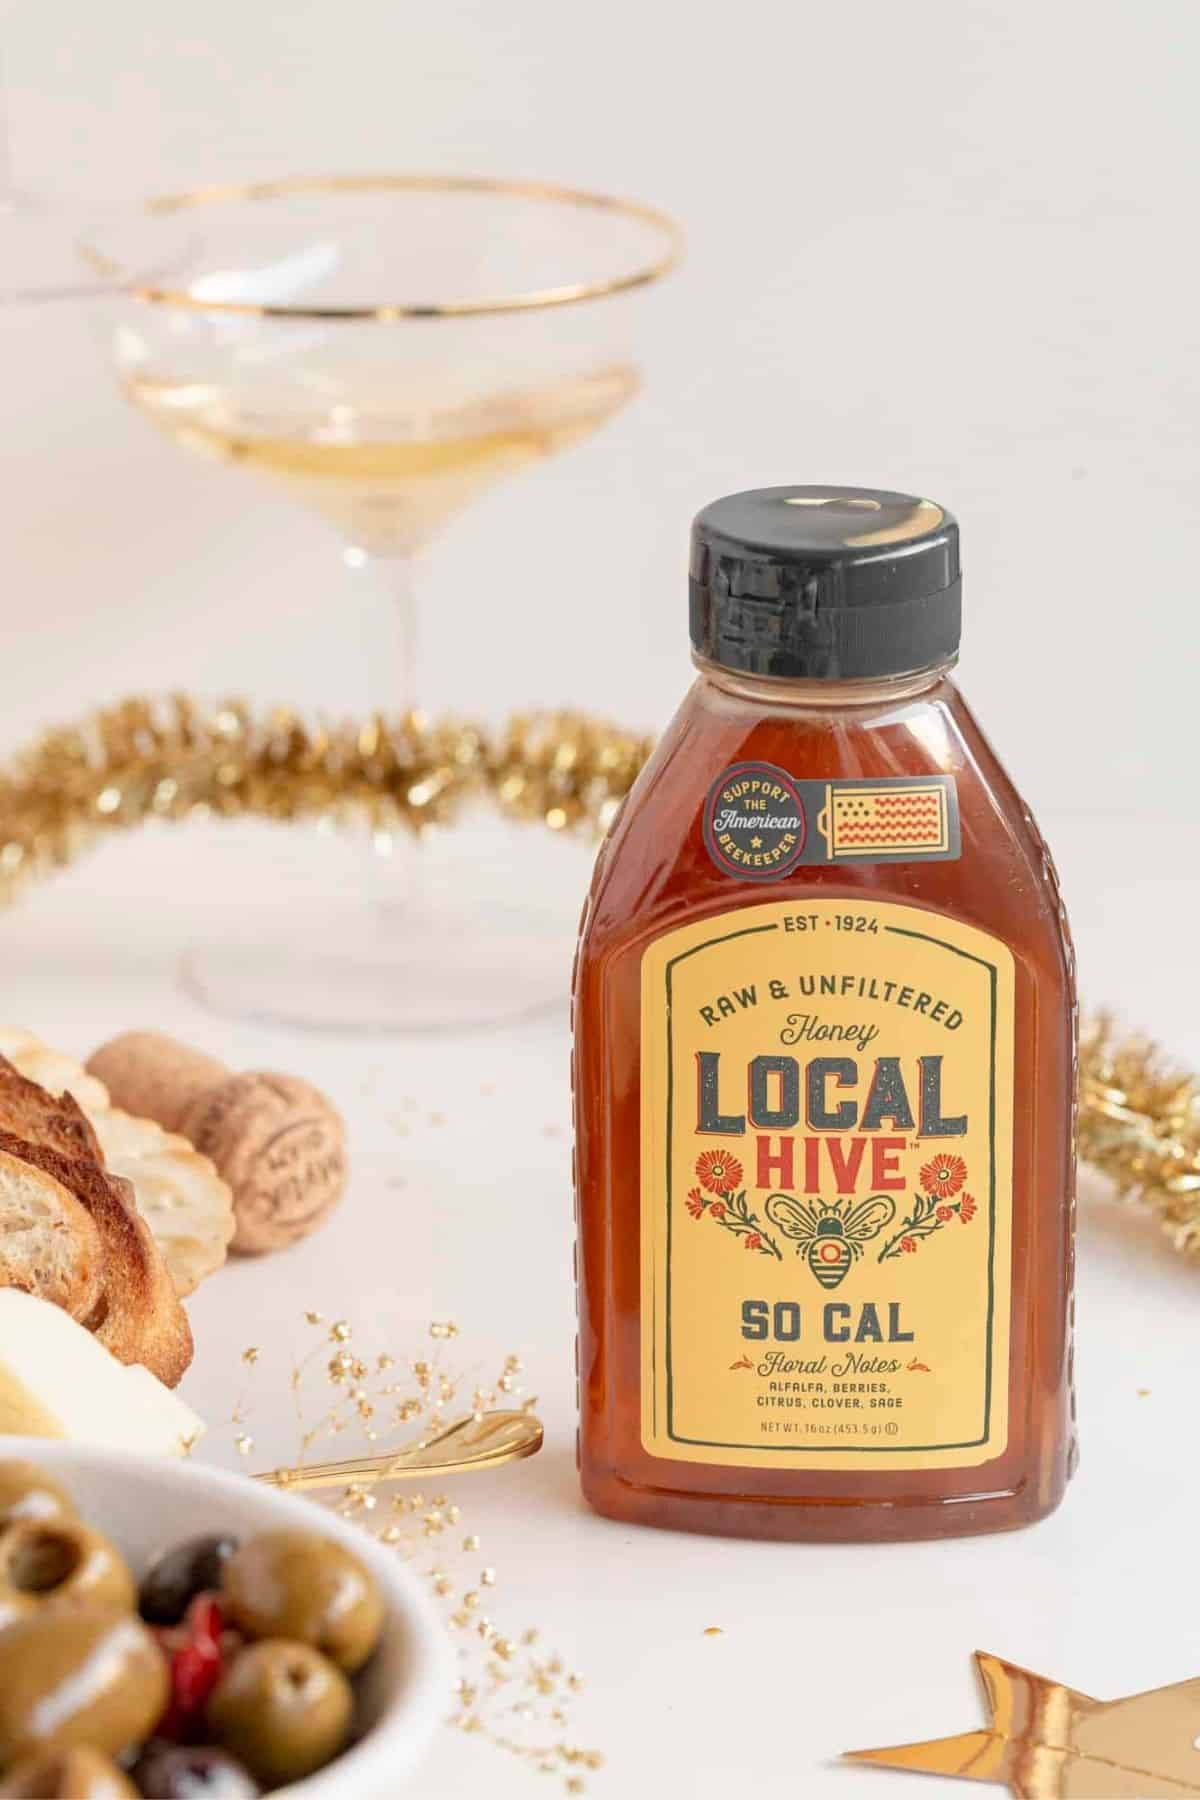
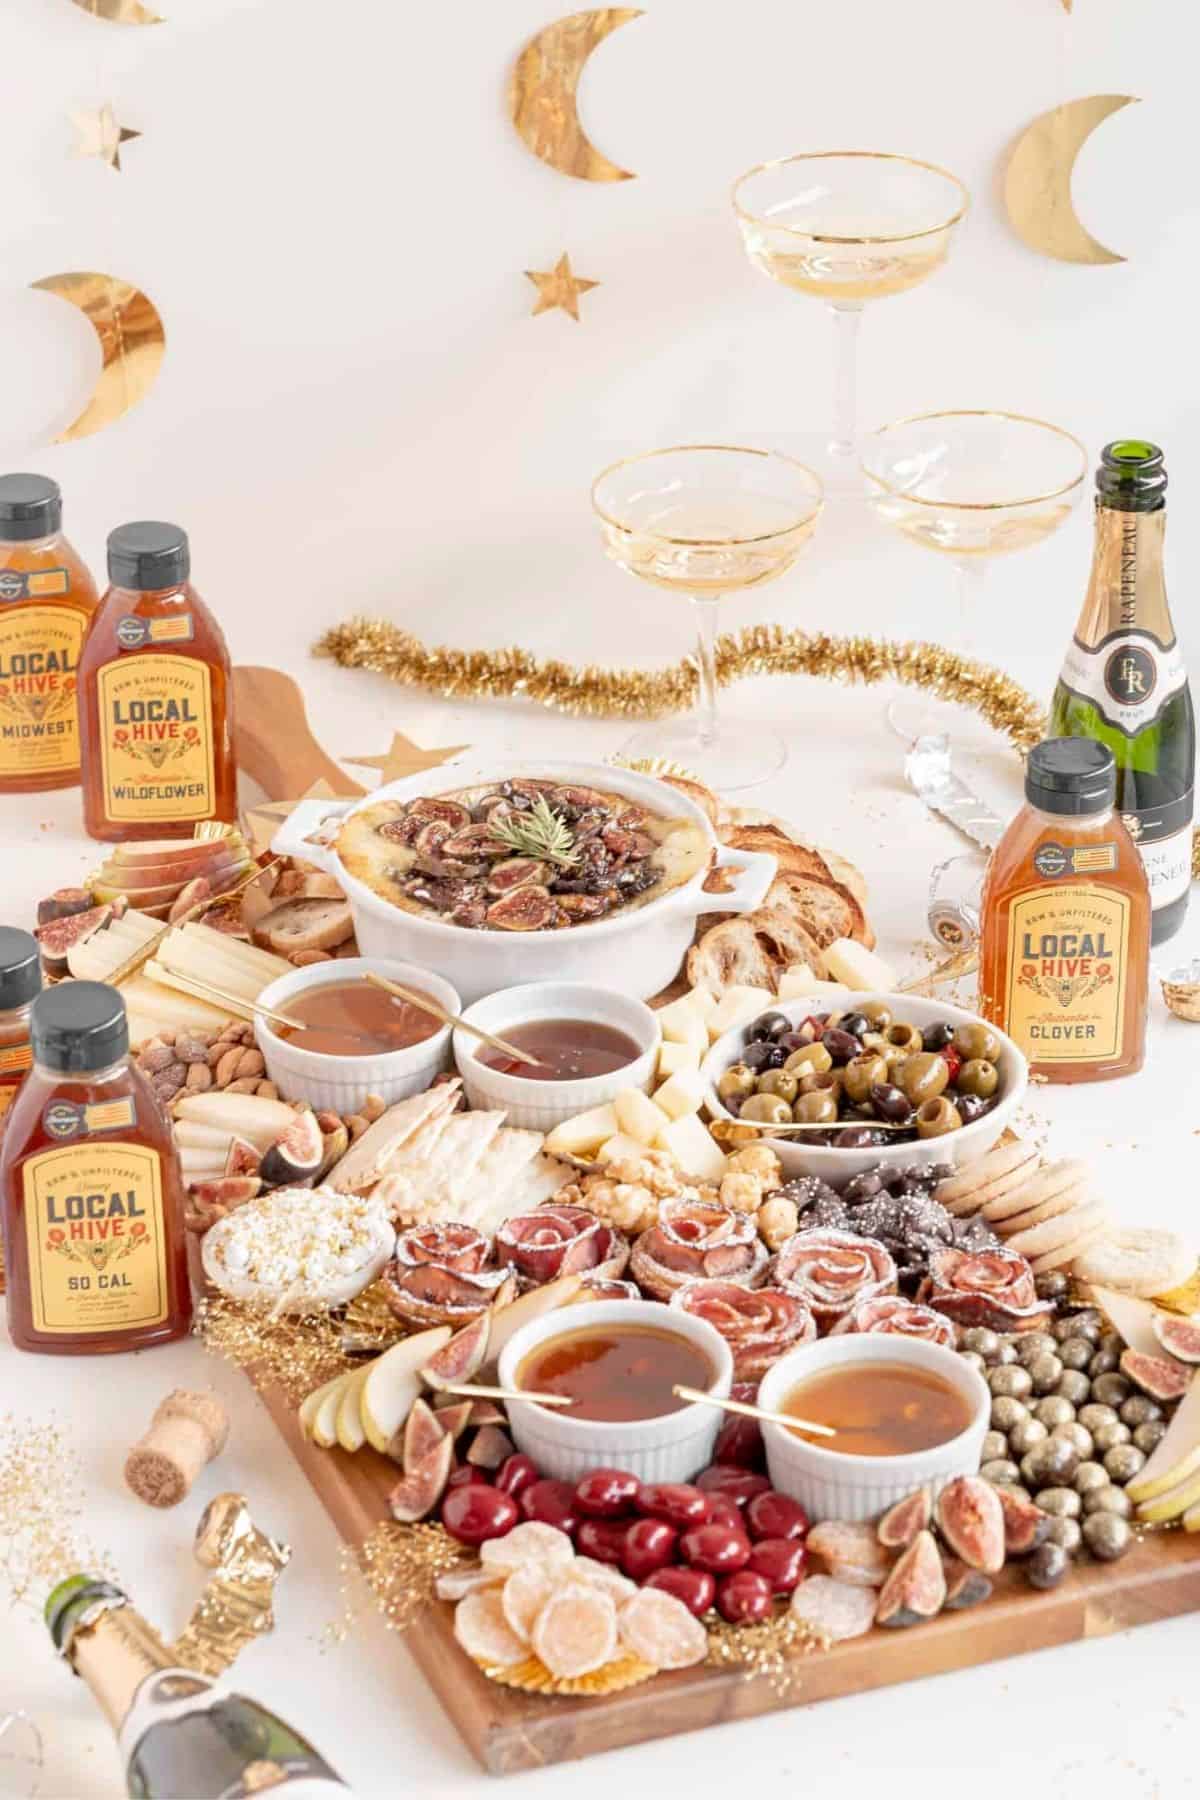
Let me tell you more about Local Hive™ before we get into too many details of this board! Local Hive™ Honey is 100% raw and unfiltered honey, made in America by American bees and beekeepers. There are 21 varietals from all over the country. And they all have their own flavor profile. I love having local raw honey on hand always to help with my allergies. So, one of my favorites is the So Cal varietal. However, since the flavors change so much between them, it’s fun to play around and cook or bake with the different flavors. My constant favorites are So Cal, Midwest, Clover, and Wildflower. You’ll see them all featured on this board!
Let’s get into some honey terms and facts. Local Hive™ shared the below with me, and it’s a great way to learn more about honey! You can of course also head to their blog for more honey information too.
Honey Terms
- Local honey: honey from a particular region.
- Mass-produced honey: honey that has been blended and filtered, losing its unique taste and color. This is your typical “bear bottle” honey and may be from anywhere in the world.
- Raw honey: honey that has not been heated above ~110ºF.
- Unfiltered honey: honey that still retains the pollen and enzymes that give it its flavor.
- Terroir: a term taken from winemaking that means “local character.” Each bottle of Local Hive has a distinct terroir and flavor profile because of where it’s made.
- Varietal honey: honey with specific & distinct local pollen sources. Each bottle of Local Hive™ features pollen that can be found inside.
Honey Facts
- Honey is one of the only foods that never spoils, and it’s perfectly safe to eat straight from the hive.
- The pollen and nectar that bees use to make local honey determine its taste and color.
- Because different plants bloom throughout the year, one hive can make many different honeys. As a result, every bottle of Local Hive is unique, and each varietal will naturally vary over time.
- Keeping honey 100% raw and unfiltered protects its natural flavors. Like a glass of wine, you will taste multiple flavor notes in every Local Hive™ honey.
- Also, like wine, tasting honey can be subjective. For a guide to some of the flavors you may taste in each bottle, see this Honey Tasting Wheel.
- Filtering and heating honey change it at the chemical level, causing it to lose its unique flavors and colors. This is why most mass-produced honey looks the same: vaguely gold, clear and fairly watery.
- Lighter colored honeys tend to be milder, while darker honeys tend to be bolder and more flavorful.
- Honey is naturally sweeter than sugar, so you can use less honey in recipes to reach the same sweetness, reducing its total calories.
How to Build a Graze Board
Ingredients on my Salty and Sweet Board
Salty Snacks
- Honey: Midwest (lighter color) and Wildflower (darker color)
- Baked Brie with Figs and Honey Recipe
- Crackers
- Baguette (toasted and un-toasted)
- Havarti cheese
- Alpine cheese
- Olives/antipasto
- Mixed nuts
- Pears (I used two in total)
- Figs (about 10 in total)
Sweet Snacks
- Honey: Clover (lighter color) and SoCal (darker color)
- Apple Roses with Puff Pastry Recipe
- Cookies
- Chocolates (dusted in gold Prism Powder)
- Chocolate covered cherries
- Candied ginger
- Caramel popcorn
- Sprinkles
- Pears (I used two in total)
- Figs (about 10 in total)
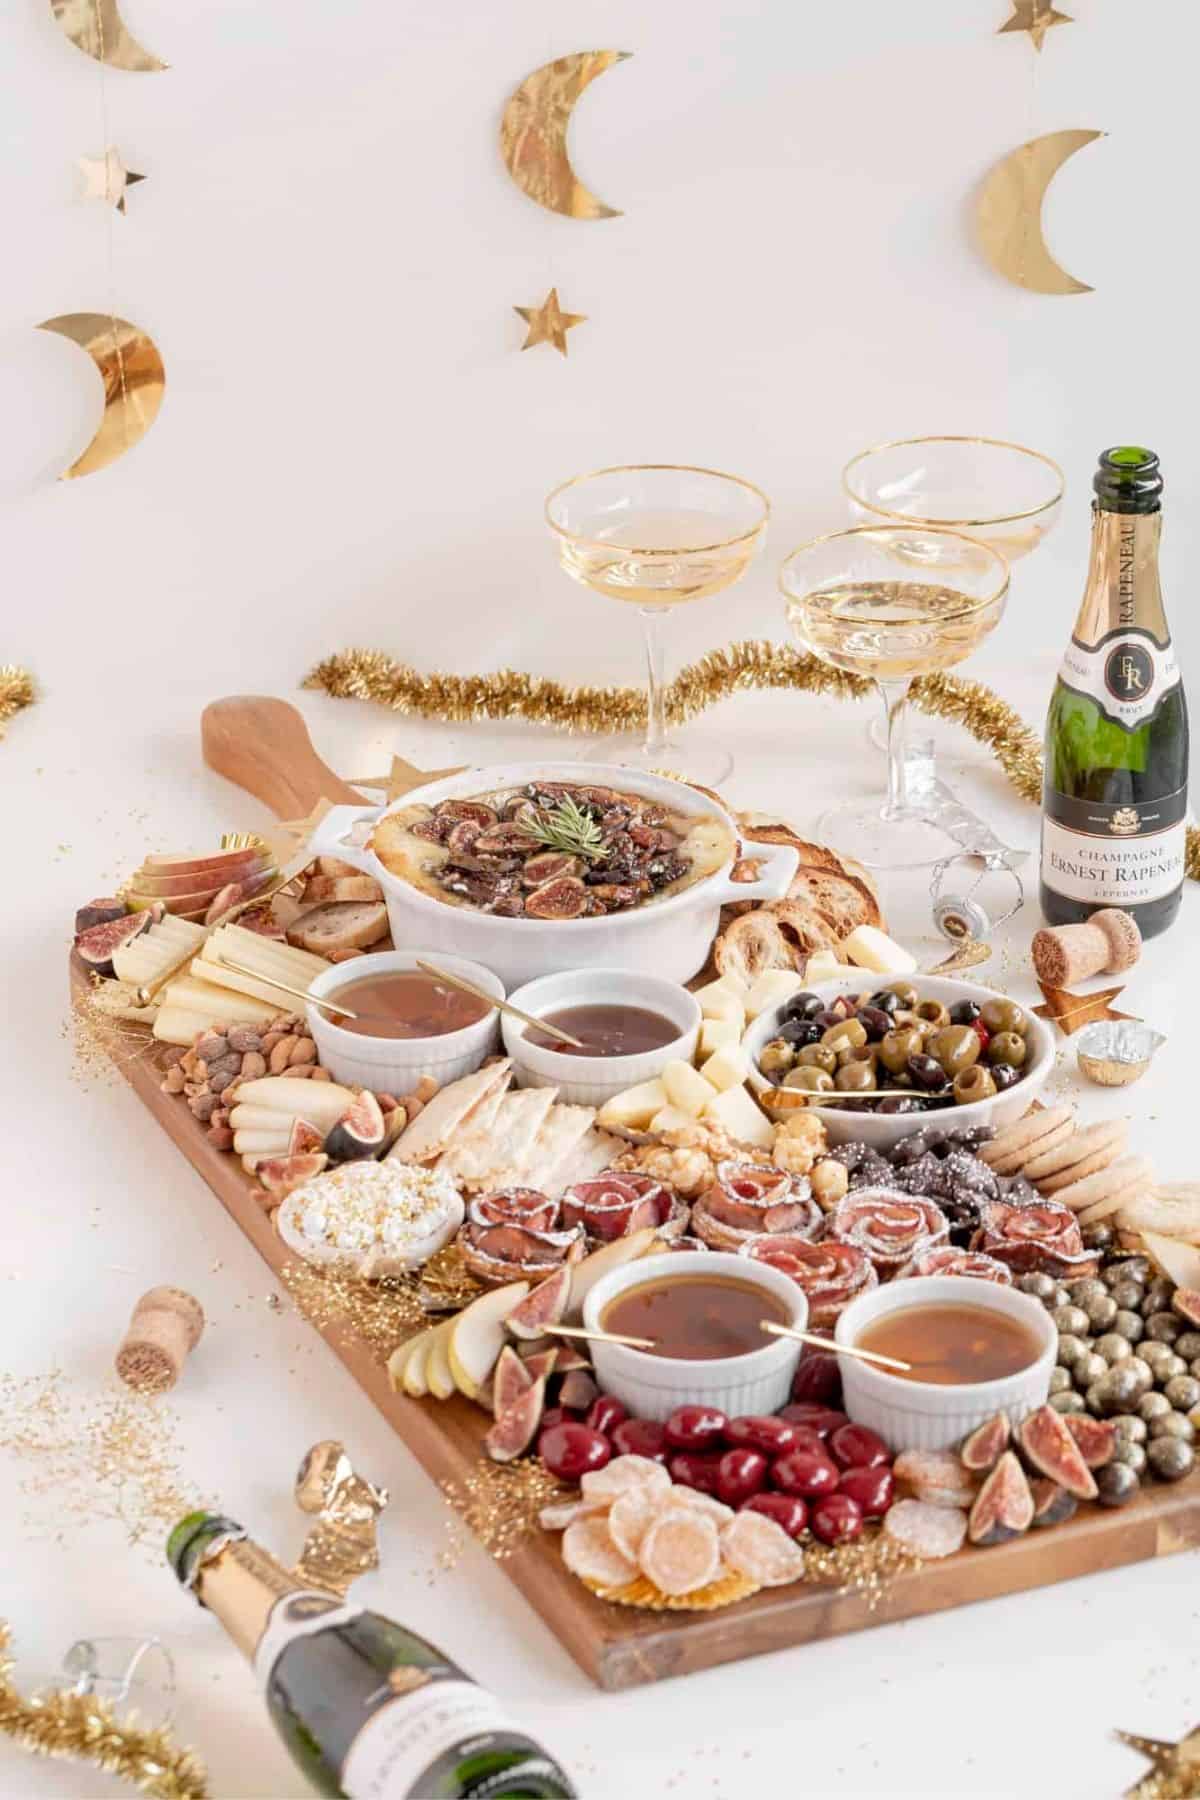
Steps for Building your Board
1. Bake– This means baking your items like the baked brie (can assemble and wait to bake until ready to serve) and apple tarts.
2. Prep your ingredients – Slice your fruits, cheeses, etc. so you are ready to plate.
3. Place board – Place board wherever it is you’ll be serving it. It’s much easier this way!
4. Create the layout – You’ll want to layout your bowls first as they can take up the most room and create a good focal point. I laid out the lid of my brie server to estimate that space. Then I laid out the honey bowls, sprinkle bowl, and antipasto bowls. Fill those you have prepped and ready…honey, sprinkles, etc.
5. Place the heroes – In this case the brie and the apple tarts are the hero. So, lay those out next, try to layer around placed items if possible.
6. Place larger items/supporting ingredients – For this board this is the cheeses, crackers, cookies, and most candies. Then, I try to slant and stack crackers, bread, and cheese. It’s just more appealing. I also added in some flattening cupcake liners for some gold flair. Again, build around the pieces already on the board.
7. Fillers – I always use a few things as fillers. For this board our fillers are nuts, fruits, popcorn, candies. Stick this in the empty spots. For a board like this…more is always more. Just keep going!
8. Utensils – Then stick in small spoons, forks, cheese knives, etc. where needed.
9. Decorate – If you like a bit of extra flair like I do, you can always add edible flowers, décor, etc. to fill in any last holes. Or you can add things like luster dust or prism powder for more glitz.
FAQs about Baked the Sweet and Salty Board
This is 100% up to you. You want to of course make sure it is food safe, but if you prefer wood, marble, stone, etc. That is all up to preference.
Some staples you'll find on an appetizer grazing board would be cheese, snack foods, small/grab-able appetizers. As for desserts, you'll find desserts that don't need to be temperature controlled, candies, and small treats.
Other Boards to Try
Love this Post?
Did you use this article and did it help you? Awesome! If you have a quick minute and could leave a comment below, I would appreciate the support and knowing your feedback! And if you’re over on Instagram, be sure to tag me in your photos.
Equipment
- Wooden or Marble Board
Ingredients
Salty:
- Honey: Midwest (lighter color) and Wildflower (darker color)
- Baked Brie with Honey and Figs
- Crackers
- Baguette, toasted and untoasted
- Havarti cheese
- Alpine cheese
- Olives/antipasto
- Mixed nuts
- Pears, I used two in total
- Figs, about 10 in total
Sweet:
- Honey: Clover (lighter color) and SoCal (darker color)
- Rose Apple Tarts with honey
- Cookies
- Chocolates, dusted in gold Prism Powder
- Chocolate covered cherries
- Candied ginger
- Caramel popcorn
- Sprinkles
- Pears, I used two in total
- Figs, about 10 in total
Instructions
- Bake – This means baking your items like the baked brie (can assemble and wait to bake until ready to serve) and apple tarts.
- Prep your ingredients – Slice your fruits, cheeses, etc. so you are ready to plate.
- Place board – Place board wherever it is you’ll be serving it. It’s much easier this way!
- Create the layout – You’ll want to layout your bowls first as they can take up the most room and create a good focal point. I laid out the lid of my brie server to estimate that space. Then I laid out the honey bowls, sprinkle bowl, and antipasto bowls. Fill those you have prepped and ready…honey, sprinkles, etc.
- Place the heroes – In this case the brie and the apple tarts are the hero. So, lay those out next, try to layer around placed items if possible.
- Place larger items/supporting ingredients – For this board this is the cheeses, crackers, cookies, and most candies. I try to slant and stack crackers, bread, and cheese. It’s just more appealing. I also added in some flattening cupcake liners for some gold flair. Again, build around the pieces already on the board.
- Fillers – I always use a few things as fillers. For this board our fillers are nuts, fruits, popcorn, candies. Stick this in the empty spots. For a board like this…more is always more. Just keep going!
- Utensils – Stick in small spoons, forks, cheese knives, etc. where needed.
- Decorate – If you like a bit of extra flair like I do, you can always add edible flowers, décor, etc. to fill in any last holes. Or you can add things like luster dust or prism powder for more glitz.
Ericka says
WOW! This looks amazing! I can't wait to make a board like this!
wilensamanda says
It's so fun to put together! Hope you enjoy putting it together and eating it all up!