Equipment
- Stand Mixer
Ingredients
Wet Ingredients
- ½ cup unsalted butter room temperature
- 1 ½ cup granulated sugar
- ½ cup grapeseed oil
- 4 eggs large, room temperature
- 1 tablespoon vanilla extract
Milk Mixture
- 1 ½ teaspoon white vinegar*
- 1 cup milk*
Dry Ingredients
- 2 ¼ cup all-purpose flour
- 6 tablespoons unsweetened cocoa powder
- 1 ½ teaspoon baking powder
- 1 ½ teaspoon baking soda
- 1 ½ teaspoon salt
Cheese Cream Frosting
- ½ cup unsalted butter room temperature
- 8 oz cream cheese room temperature
- 1 tablespoon vanilla
- 4 cups powdered sugar sifted
- 3 tablespoons cocoa powder sifted
Optional
- sprinkles
- candy ghosts**
Instructions
Cupcakes
- Preheat the oven to 350° F.
- Using your paddle attachment on your stand mixer, beat together the butter and sugar and mix on medium speed, about 4, for 4-5 minutes. You want it light in color and fluffy. Scrape sides of bowl as needed.
- Then add in oil, eggs, vanilla all separately and mix about 30 seconds to 1 minute each. Until each is incorporated.
- Add milk and vinegar in a small bowl and set to the side.
- In a separate large bowl, sift the flour, cocoa, baking powder, baking soda, and salt. Mix thoroughly.
- Turn your stand mixer back onto a low speed and slowly add ⅓ of the dry ingredients into the wet ingredients. Mix until combined. Add in ½ of the milk mixture until combined. Mix in another ⅓ of the remaining dry ingredients. Mix until thoroughly combined. Then add in the rest of the milk mixture and mix until combined. And then finally add in the last of the dry mix. Mix until combined, but don't over mix. Scrape sides of bowl as needed.
- Let the batter sit while you prepare the pans. This allows the batter to rise a bit more.
- Prepare three 6”cake pans with liners. Add the cake batter evenly among the three pans.
- Place the cakes into the oven. Bake for 45-55 minutes. Check with a toothpick until it comes out clean.
- Take cakes out and cool in the pan. Then remove from pans to cool on a cooling rack.
Cream Cheese Frosting
- Using your paddle attachment cream the butter by itself for 2 minutes. This helps to create a fluffy texture. Scrape sides of bowl as needed.
- Add in cream cheese and mix on medium for 6 minutes. Scrape sides of bowl as needed.
- Add in the vanilla and stir until well combined.
- Add in powdered sugar slowly. Mix until thoroughly combined and smooth. Then add in the cocoa powder. Allow to continue to mix for 2-3 minutes to let it fluff up. Scrape sides of bowl as needed.
Assembling
- Take a cake leveler or serrated knife and slice off the domed tops.
- Place one cake layer sliced side up on a cake stand or plate. Then scoop or pipe some frosting onto the top of that level. Smooth over with an offset spatula or butter knife.
- Next, take another cake layer on with the sliced side down. Again, scoop or pipe some frosting onto the top of that level. Smooth over with an offset spatula or butter knife.
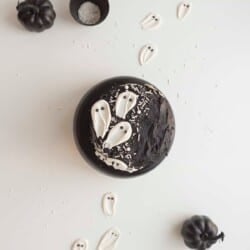
- Then take the last layer and lay it on top with the sliced side down. Add on frosting and smooth over the entire cake. There is no need for a crumb coat on this cake as it’s all black and you won’t be able to see the crumbs. Coat the whole cake in frosting.
- Add little ghosts and sprinkles and serve.
Notes
*Or replace with just 1 cup of buttermilk
**Candy ghosts can be found on blog at: https://amandawilens.com/ghost-candy/
- Black cocoa powder: You can find this online fairly easily. Too much of this and you might taste a little chemically. This can also mess up the color of your BM, so be forewarned. Also, be sure to not be wearing your favorite outfit/apron, use your metal bowl mixer if you have one, and use pure silicone items. This will help from staining.
- Black food dye: You can replace the black cocoa powder with regular cocoa powder for an all-brown cake or add some black food dye. This can also mess up the color of your BM, so be forewarned. Also, be sure to not be wearing your favorite outfit/apron, use your metal bowl mixer if you have one, and use pure silicone items. This will help from staining.
- Storing: If you don't eat your whole cake in one sitting, I recommend storing it in the fridge as the frosting is made with cream cheese. You can store them in the fridge for up to 5-7 days.
- Whipping Butter and Sugar: This step is necessary for getting a light and fluffy cupcake, don't skimp on it. It adds needed air to the batter so your cake isn't too dense.
- Whipping Butter and Cream Cheese: Again, this is to help with the texture. This makes for a light and fluffy and perfectly balanced frosting.
- Room Temperature: Whenever something says room temperature, it's so important to follow those instructions. If you don't use room temperature things might not mix together and incorporate properly.
Tried this recipe?Mention @amanda.wilens